How To Remove Carpet And Install New Flooring: A Step‑By‑Step Guide
Tearing out old carpet and putting in new flooring is one of those home improvement projects that sounds intimidating but is very doable for many homeowners. The catch: the “right” way to do it depends on your home, your subfloor, your chosen flooring, your tools, and your comfort level with DIY.
This guide walks through the general process, explains how it changes for different types of flooring, and flags the key decisions where your own situation matters.
Key Questions People Ask Before Removing Carpet
Is it hard to remove old carpet?
Removing carpet is usually more physical than technical. The toughest parts tend to be:
- Cutting and rolling heavy carpet and padding
- Pulling up tack strips and staples
- Dealing with stubborn glue or pet damage
- Managing disposal of bulky material
The difficulty depends on:
- Room size – larger rooms = more material to haul
- How it was installed – heavily glued vs. just tack strips and staples
- Your subfloor – concrete vs. wood
- Your tools – having the basics (utility knife, pry bar, pliers) helps a lot
For many people, carpet removal is the part they feel comfortable DIY‑ing, even if they hire pros for the new flooring.
Can I install new flooring directly after removing carpet?
Often yes, but not always immediately. You typically need to:
- Inspect the subfloor (what’s under the carpet)
- Repair or patch problems
- Level or smooth the surface if needed
- Acclimate some types of new flooring to the room (like hardwood or vinyl planks)
How much prep you need depends on:
- The type and condition of your subfloor
- The type of new flooring you’re installing
- Moisture issues, squeaks, dips, or old adhesive
Tools and Supplies You’ll Typically Need 🛠️
You don’t need a contractor’s van, but a few basics make life easier. Here’s a general list:
For carpet removal:
- Heavy‑duty utility knife with sharp blades
- Work gloves and eye protection
- Dust mask (especially in older or dusty homes)
- Pry bar or flat bar
- Hammer
- Pliers (for staples)
- Floor scraper (for stuck padding or glue)
- Heavy‑duty trash bags or twine to tie up carpet rolls
- Knee pads (optional, but helpful)
For new flooring (varies by type):
- Tape measure and carpenter’s pencil
- Chalk line (for layout)
- Spacers (for floating floors)
- Appropriate saw: miter saw, circular saw, or jigsaw, depending on the material
- Underlayment (foam, felt, or other, depending on your flooring)
- Manufacturer‑recommended adhesive or fasteners (if needed)
Your exact list will change with your flooring choice (more on that below).
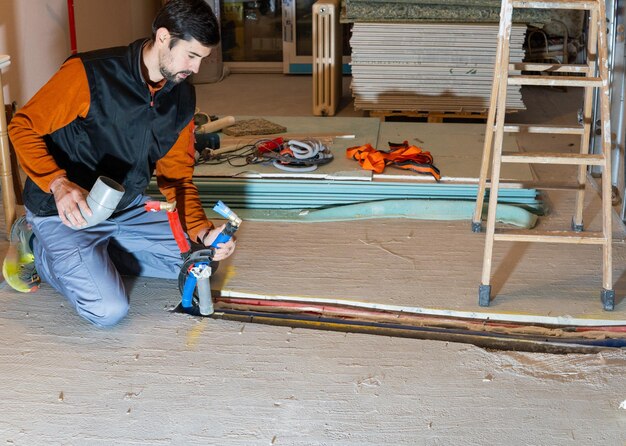
Step‑By‑Step: How To Remove Carpet
1. Clear and prep the room
- Remove furniture, doors that swing into the room, and baseboard heaters if needed.
- If you plan to reuse baseboards, carefully score the caulk line with a utility knife and gently pry them off. If not, many people leave them on and install flooring up to them with a quarter‑round trim later.
- Ventilate the space and put on gloves and a dust mask.
2. Cut and pull up the carpet
- Find a corner, use pliers to grab the carpet, and pull it up from the tack strip.
- Once a corner is free, pull back a section several feet.
- Use a utility knife to cut the carpet into narrow strips (usually 2–3 feet wide). This makes it manageable to roll and carry.
- Roll each strip tightly, then tape it or tie it with twine.
Variables that change this step:
- Concrete vs. wood subfloor: On concrete, the tack strips are nailed into the slab and can be tougher to remove later.
- Stairs: Carpet on stairs has its own pattern and may be more time‑consuming to remove.
- Pets or heavy staining: You may want to cut out and bag heavily soiled sections separately.
3. Remove the carpet pad
Under the carpet, you’ll usually find a foam or fiber pad:
- If it’s stapled: Pull up the pad in sections and use pliers or a floor scraper to remove staples.
- If it’s glued: Peel it up and scrape off remaining chunks with a floor scraper. This can be slow going if a lot of adhesive was used.
- Roll and bag or bundle pad sections for disposal.
Things that affect difficulty:
- Age of the pad – older padding can crumble and stick to the floor
- Glue used – some adhesives are thin and scrape off easily, others are gummy and stubborn
4. Remove tack strips and staples
Around the room’s perimeter, you’ll see wooden tack strips with small nails and sharp tacks:
- Slide a pry bar under the strip near a nail and gently lift.
- Work along the length, prying at each nail to reduce the chance of splitting wood subfloors.
- Be cautious: the tacks are sharp and can puncture skin or shoes.
- Collect all strips and nails carefully in a sturdy container.
For staples:
- Use pliers to pull them out or a floor scraper to pop them up.
- Aim to clear the floor so you can run your hand (with a glove) across it without catching on anything.
On concrete, the tack strips may be more firmly anchored; some people use a heavier pry bar or specific masonry tools.
5. Handle carpet and pad disposal
Local rules vary, so the “right” disposal method depends on:
- Your city or county’s waste policies
- Whether bulk pickup is available
- Whether there are recycling options for carpet in your area
- How much material you have (single room vs. entire house)
Options usually include curbside bulk pickup, taking it to a transfer station or landfill, or using a dumpster service for larger projects.
Assessing Your Subfloor After Carpet Removal
Once the carpet and pad are gone, the real story of your floor condition shows up. The subfloor is the structural layer under your carpet: usually plywood/OSB or concrete.
What to look for on a wood subfloor
- Soft spots or rot
- Water stains or a musty smell
- Loose or squeaky areas (walking around reveals these)
- Large gaps, cracks, or uneven seams
- Lots of leftover adhesive from previous flooring
Common fixes (depending on severity):
- Re‑fastening loose subfloor with screws
- Patching small damaged areas
- Replacing sections if they are rotten or structurally unsound
- Sanding or using a floor leveler for small dips or seams
What to look for on a concrete subfloor
- Cracks (hairline vs. wider)
- High or low spots (check with a long straightedge or level)
- Signs of moisture: dark spots, efflorescence (white powdery deposits), or dampness
- Old adhesive ridges or uneven patches
Depending on what you find, you may need:
- Crack repair products
- Self‑leveling compound for dips
- Grinding high spots
- Moisture testing or mitigation measures
How far you go here depends heavily on the type of new flooring you want and your tolerance for small imperfections.
Choosing New Flooring After Removing Carpet
Not all flooring behaves the same when installed over a former carpeted area. The right choice depends on:
- Your subfloor type (wood vs. concrete)
- Room use (bedroom vs. kitchen vs. basement)
- Moisture levels
- Your comfort level with tools and precise cuts
- Your budget and time frame
Here’s a simplified comparison:
| Flooring Type | DIY Difficulty | Works on Wood | Works on Concrete | Notes After Carpet Removal |
|---|---|---|---|---|
| Laminate (floating) | Moderate | ✔️ | ✔️ (with prep) | Often forgiving; needs flat, clean surface |
| Luxury vinyl planks/tiles | Moderate | ✔️ | ✔️ (popular) | Good for moisture; usually needs smooth subfloor |
| Engineered hardwood | Moderate–Hard | ✔️ | ✔️ (some types) | More sensitive to moisture and flatness |
| Solid hardwood | Hard | ✔️ | Limited | Requires nailing to wood and a well‑prepped subfloor |
| Tile (ceramic/porcelain) | Hard | ✔️ (proper underlayment) | ✔️ | Needs very flat, solid base; more advanced |
| Sheet vinyl | Moderate | ✔️ | ✔️ | Shows imperfections easily; subfloor needs to be smooth |
Your specific room also matters:
- Basements: often better suited to vinyl or tile than solid hardwood due to moisture
- Bathrooms: favor water‑resistant products like vinyl or tile
- Bedrooms and living areas: wide range of options, including laminate, engineered wood, or carpet again
General Steps To Install New Flooring (By Type)
The exact instructions always come from the manufacturer’s installation guide, but here’s what the overall process usually looks like.
Installing a floating floor (laminate or many vinyl planks)
A floating floor locks together and “floats” over the subfloor without being nailed or glued down.
Basic process:
- Prep and clean the subfloor thoroughly. Any debris can telegraph through and affect seams.
- Lay any required underlayment (foam or combination underlayment with vapor barrier).
- Acclimate the planks if recommended (let them sit in the room for a certain time).
- Measure the room and plan layout so you’re not left with a very skinny plank at one wall.
- Start in one corner, using spacers along the wall to maintain the expansion gap.
- Click planks together row by row, staggering end joints according to instructions.
- Cut planks at the end of rows using a suitable saw or cutter.
- Remove spacers and install baseboards or quarter round to cover expansion gaps.
Variables that matter:
- Room shape (lots of doorways and corners add complexity)
- Subfloor flatness (floating floors need reasonably even surfaces to avoid “spongy” spots)
- Moisture barriers (especially on concrete or over crawlspaces)
Installing nail‑down or staple‑down hardwood
This approach fastens boards directly to a wood subfloor.
General flow:
- Confirm the subfloor is thick and sound enough and meets manufacturer recommendations.
- Acclimate the hardwood for the recommended time.
- Snap chalk lines to establish straight starting rows.
- Blind nail or staple boards at the tongue using a flooring nailer and compressor (for most systems).
- Face‑nail at walls and tight areas where the nailer won’t fit.
- Cut boards as needed at the ends of rows.
This method is more advanced, and subfloor condition is more critical. Changes in humidity can cause gaps or movement if the prep or installation isn’t done carefully.
Installing glue‑down flooring
Some engineered hardwoods, vinyl tiles, and sheet vinyl are installed with adhesive:
- Make sure the subfloor is very clean, dry, and smooth. Adhesive usually doesn’t hide lumps or dips.
- Use the recommended adhesive and trowel size from the manufacturer.
- Spread adhesive over a workable area and lay flooring into the wet or tacky adhesive (timing depends on product).
- Roll the floor with a floor roller (for many vinyl and sheet products) to ensure good contact.
Variables:
- Adhesive type and working time
- Room temperature and humidity
- Your experience with spreading adhesive evenly
Installing tile after carpet
Tile installation is its own skill set and typically more demanding:
- Make sure the subfloor is rigid and flat. Add cement board or an uncoupling membrane over wood subfloors.
- Plan layout to avoid tiny slivers of tile at walls.
- Mix and spread thinset mortar with a notched trowel.
- Set tiles using spacers, checking for level and alignment.
- After curing, apply grout between tiles and then seal grout if needed.
Tile is less forgiving of subfloor issues than many other materials.
Do I Need Underlayment After Removing Carpet?
Underlayment is a separate layer between your subfloor and your new flooring. Whether and what you need depends on:
- The flooring product (some have underlayment attached, some require a specific type)
- Subfloor type (wood vs. concrete)
- Sound and comfort preferences
- Moisture considerations
Common types:
- Foam underlayment: Used with many laminates and floating floors to provide a little cushion and sound reduction.
- Combination underlayment with vapor barrier: Often recommended over concrete or crawlspaces for laminate or vinyl.
- Felt or cork underlayment: Used under some engineered floors for sound and slight leveling.
- Cement board or uncoupling membrane: Used under tile, not for softness but for stability and crack isolation.
The flooring manufacturer usually spells out what’s required and what voids a warranty.
How Long Does it Take to Remove Carpet and Install New Flooring?
Timing ranges widely, and your own pace matters. In general:
- Carpet removal in one room can often be done in part of a day, depending on room size and how stubborn the installation is.
- Subfloor repairs/leveling may add anything from an hour or two to multiple days (especially if leveling compound needs curing time).
- Floor installation might range from a day for an experienced DIYer with a simple floating floor in a straightforward room, to several days or more for more complex layouts or materials like tile or nail‑down hardwood.
Factors that shift the timeline:
- Experience level with tools and layout
- Room shape and obstructions (closets, stairs, many doors)
- Whether you’re working alone or with help
- Drying/curing times for compounds, adhesives, or finishes
Safety and Health Considerations 😷
When you pull up old carpet, you’re also disturbing:
- Dust, pollen, and dander
- Possible mold or mildew from old spills or leaks
- In older homes, unknown adhesives or materials
Reasonable precautions:
- Wear a dust mask or respirator, gloves, and eye protection.
- Ventilate the area with open windows or fans when possible.
- If you suspect mold, significant water damage, or older materials you’re worried about (for example, you’re in an older home and don’t know what’s under there), some people choose to consult a professional before proceeding.
When Is It Better to Call a Pro?
Plenty of people DIY the whole process; plenty also mix and match (DIY removal, pro installation). Situations that often push people toward hiring help include:
- Serious subfloor damage (rot, structural concerns, major leveling issues)
- Very uneven concrete or known moisture problems
- Large or complicated spaces with lots of transitions, stairs, or unusual layouts
- Desire for solid hardwood, intricate tile, or patterned layouts that require precision
- Limited time, tools, or comfort with saws and power tools
Your own budget, time, and risk tolerance will shape where you draw the line.
What To Think Through Before You Start
Before you grab the utility knife, it helps to have a short checklist:
- What kind of subfloor do I have (wood or concrete)?
- What new flooring am I considering, and what does its manufacturer say about subfloor requirements?
- How comfortable am I with cutting, measuring, and following detailed instructions?
- What are my local disposal options and rules for old carpet and pad?
- Do I have, or can I access, the tools I’ll need?
- Are there any signs of water, mold, or structural issues that might be beyond my comfort level?
Once you’ve answered those for your own home, you’ll have a much clearer sense of whether removing carpet and installing new flooring is a project you want to tackle yourself, partially DIY, or leave fully to professionals.