How To Build a Raised Garden Bed: A Simple, Step‑by‑Step Guide
Raised garden beds are one of those outdoor projects that look complicated from the outside, but once you understand the basics, they’re very approachable. Whether you want easier weeding, better soil, or just a neat-looking garden, a raised bed can help.
This guide walks through how to build a raised garden bed, what decisions you’ll need to make along the way, and how different choices affect cost, effort, and results.
What Is a Raised Garden Bed, Exactly?
A raised garden bed is simply a planting area that’s higher than the surrounding ground. You can:
- Build a framed bed with sides made from wood, stone, metal, or other materials
- Create a mounded bed (no rigid sides) by piling soil into a defined shape
Most people mean a framed, rectangular bed when they talk about raised beds. These usually sit directly on the ground and are filled with a mix of topsoil and compost.
Why people choose raised beds
Common goals include:
- Better soil: You control what goes in, instead of battling poor native soil.
- Improved drainage: Helpful if your yard tends to stay soggy.
- Less bending: Taller beds can be easier on your back.
- Fewer weeds: Especially compared with tilling an in-ground garden.
- Neater layout: Beds help define paths and planting zones.
Whether those benefits matter to you depends on your soil, climate, budget, and how you like to garden.
Step 1: Decide What You Want from Your Raised Bed
Before you buy boards or soil, it helps to be clear about your priorities. The “best” raised bed for you depends on:
1. Your goals
- Maximum food production: You may want deeper beds and richer soil.
- Low-maintenance landscaping: Durability and appearance might matter more.
- Accessibility: Taller beds or even waist-height beds can make a difference.
- Experimenting on a budget: Simple, shallow beds with inexpensive materials might be enough to start.
2. Your space
- Size of yard or patio
- Sun exposure (most vegetables like 6–8 hours of sun)
- Slope or uneven ground
3. Your budget and tools
- Are you comfortable with basic DIY tools (saw, drill, level)?
- Do you already own tools, or will you keep the design simple to avoid buying more?
- Are you okay with materials that eventually decay (like untreated wood), or do you want long-term options (like stone or metal)?
Once you’re clear on those points, choices about size, materials, and design fall into place more easily.
Step 2: Choose a Size and Location
There’s no one-size-fits-all raised bed, but a few general guidelines make beds more practical to use.
How big should a raised bed be?
Two main dimensions matter: width and height.
Width (how far you reach in from the sides)
Most people aim for a bed that:
- Can be comfortably reached from both sides without stepping into it
- Allows you to work in the center without overstretching
Many home gardeners find beds around 3–4 feet wide manageable. Narrower can be good for children or people with limited mobility; wider can be tricky to reach the middle.
Length
Length is flexible. People often choose lengths in the range of 4–12 feet, depending on space and materials. Longer beds:
- Give more growing space
- Need more soil and bracing to avoid bowing sides
Height
Typical raised beds are often anywhere from 8–24 inches tall or more. Height affects:
- Root depth: Deep-rooted crops like tomatoes and carrots appreciate more depth.
- Comfort: Taller beds require less bending.
- Cost: More height means more materials and more soil.
You don’t have to replace all the soil below the bed. Roots often grow into the native soil, especially if you loosen it first. That said, in very poor or compacted soil, extra height can help.
Choosing the right spot in your yard 🌱
Consider:
- Sunlight: Most vegetables and flowers want several hours of direct sun. Leafy greens tolerate more shade.
- Access to water: Dragging a hose a long way gets old.
- Proximity to your house: Beds close to your door tend to get more regular attention.
- Ground conditions: Level or close to level is easiest. Steep slopes may need terracing or stepped beds.
- Trees and roots: Large trees can compete for moisture and send roots into your bed over time.
There’s no perfect spot for everyone; you’ll be balancing sun, access, aesthetics, and how much effort you’re willing to put into leveling the area.
Step 3: Pick Your Raised Bed Materials
Different materials have different trade-offs in cost, appearance, and lifespan.
Common raised bed materials compared
| Material | Pros | Cons | Typical Use Case |
|---|---|---|---|
| Untreated wood | Affordable, easy to cut and screw, widely available | Decays over time, needs replacing eventually | Budget-friendly, first projects |
| Naturally rot-resistant wood (like cedar) | Longer-lasting, looks nice | Higher cost, may still weather | Mid-range budget, visible yards |
| Composite boards | Rot-resistant, smooth or finished look | Higher material cost, needs specific fasteners | Long-term beds with low maintenance |
| Metal (steel/aluminum) | Very durable, thin sides save space | Can heat up in hot sun, cost varies | Modern look, long-term installation |
| Stone, brick, or block | Extremely durable, looks permanent | Heavy, more labor, often higher cost | Decorative or long-term garden design |
You can also build from reused materials like old timbers or pallets, but you’ll want to understand whether they’re treated with chemicals and how that aligns with your comfort level, especially for food gardening.
What about treated lumber?
Modern pressure-treated lumber is typically made with different chemicals than older versions that contained arsenic. Many gardeners do use current treated wood for raised beds, while others avoid it for food crops out of caution.
The key decision points are:
- Your comfort level with chemical treatments
- Whether the bed is for edible plants or ornamental plants
- Local availability and cost of alternatives
If you’re unsure, you can:
- Use treated lumber for exterior framing and line the inside with a barrier where soil touches the boards, or
- Opt for naturally rot-resistant or untreated wood and accept that it will eventually break down and need replacing
Step 4: Prepare the Ground Under Your Raised Bed
What you do under the bed affects drainage, weeds, and root health.
Options for the base
Directly on the soil (most common)
- Remove sod/weeds or cover them with cardboard.
- Loosen the top layer of native soil with a shovel or garden fork.
- Pros: Good drainage, roots can go deep.
- Cons: Some existing weeds may return if not well-suppressed.
On top of grass with weed barrier
- Lay down cardboard or thick newspaper layers to smother grass.
- Add soil on top; over time the barrier decomposes.
- Pros: Less digging up front.
- Cons: Persistent perennial weeds can still find a way through in some cases.
On hard surfaces (patios, concrete, balconies)
- Use beds with solid bottoms and drainage holes, or add a layer of gravel for drainage.
- Pros: Lets you garden where there’s no soil.
- Cons: Limited depth, more careful water management needed.
In many yards, the usual choice is to remove major weeds, loosen soil, and possibly lay cardboard to give plants a helpful start while discouraging unwanted growth.
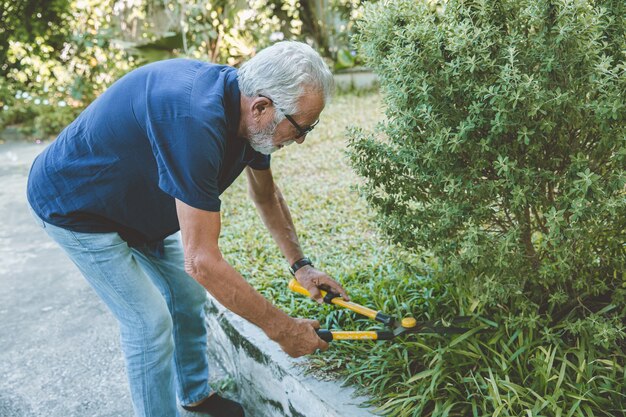
Step 5: Build the Frame: Step‑by‑Step
Here’s a straightforward process for a simple framed bed using wood, which is a common DIY choice. You can adjust the steps to suit your materials.
Basic tools and skills
You’ll typically want:
- Measuring tape and pencil
- Saw (hand saw or power saw)
- Drill or driver with exterior screws
- Carpenter’s square (or something to check right angles)
- Level (optional but helpful)
If tools are limited, you can design your bed around pre-cut standard board lengths to reduce cutting.
Step A: Measure and cut
- Decide your bed’s length, width, and height.
- Cut boards to match:
- Two boards for the long sides
- Two boards for the short sides
- For taller beds, you may stack boards (for example, two boards high) and use corner posts to tie the layers together.
Step B: Assemble the sides
- Lay the boards on a flat surface in a rectangle.
- Make sure corners are square.
- Drill pilot holes to avoid splitting the wood.
- Fasten corners with exterior-grade screws.
For longer beds, consider adding interior braces (short pieces of wood) to keep the sides from bowing outward once filled with soil.
Step C: Position and level the frame
- Move the assembled frame to your chosen location.
- Check that it’s roughly level, or at least not wildly tilted.
- If needed:
- Scrape away high spots
- Add soil or sand under low spots
- Use stakes or corner posts sunk slightly into the ground for extra stability
A perfectly level bed isn’t required for plants to grow, but extreme slopes can cause water to pool at one end and run off at the other.
Step 6: Fill the Bed with Soil
What you put in the bed has a huge impact on how well your plants do.
What goes into raised bed soil?
Gardeners often use a mix of:
- Topsoil (or garden soil)
- Compost (plant-based, animal-based, or mixed)
- Optional additions like leaf mold, aged manure, or other organic material
The goal is soil that:
- Drains well but retains enough moisture
- Is rich in organic matter
- Feels loose and crumbly, not compacted or sticky
Many people work with a blend of soil and compost, then adjust over time based on how the bed behaves (too dense, too sandy, too dry, etc.).
How much soil do you need?
You’ll need enough to fill the frame to your desired depth. A common pattern is to:
- Fill most of the depth with a bulk soil/compost blend, then
- Top off with a few inches of richer compost or high-quality garden soil
Some gardeners also use a layering (“lasagna”) approach, alternating browns (like leaves, straw, or cardboard) and greens (like grass clippings or kitchen scraps) beneath or within the bed and topping with a finished soil layer. Over time, it breaks down and enriches the bed. This approach can be useful if you want to reduce the amount of purchased soil, but it takes time to fully decompose.
Variables that affect your soil choice
- Existing soil quality: If your yard soil is very poor, you might rely more heavily on purchased blends.
- Intended plants: Heavy feeders (like tomatoes, squash) often benefit from richer soil.
- Budget: Bulk or locally sourced materials can reduce cost compared with a bag-only approach.
- How quickly you want to plant: Raw, undecomposed organic layers need more time; finished soil is ready right away.
Step 7: Plan What to Plant and How to Space It
Once the structure and soil are in place, the fun part begins.
Matching plants to bed depth and size
Some general patterns:
- Shallow-rooted plants (lettuce, spinach, many herbs) do fine in modest depth.
- Deep-rooted plants (tomatoes, peppers, carrots) appreciate more depth and loose soil.
- Sprawling plants (pumpkins, melons, large squash) may need more ground space than raised beds easily provide, or creative training and trellising.
You’ll need to consider:
- How many plants realistically fit without crowding
- Sun exposure of each bed (some plants handle partial shade better)
- Crop rotation: Over multiple seasons, rotating plant families can help reduce disease build-up.
Seed packets and plant tags often give spacing guidelines. In raised beds, some gardeners plant a bit closer together, relying on good soil and careful watering, while others stick to more traditional spacing for ease of care and airflow.
Step 8: Watering, Mulching, and Ongoing Care
A raised bed isn’t “set and forget.” It still needs regular attention, just in a more organized space.
Watering
Raised beds often drain faster than in-ground soil, which can be great in wet climates and more challenging in dry ones.
Factors that affect your watering routine:
- Climate and rainfall patterns
- Bed depth: Deeper beds hold more moisture.
- Mulch use: Mulch helps reduce evaporation.
- Plant type: Young seedlings need more consistent moisture.
Some gardeners install drip lines or soaker hoses, while others water by hand. Both can work; the right choice depends on your time, budget, and layout.
Mulching
A layer of organic mulch (like straw, shredded leaves, or wood chips around but not touching stems) helps:
- Conserve soil moisture
- Reduce weed growth
- Moderate soil temperature
Over time, mulch breaks down and adds organic matter to your bed.
Seasonal maintenance
Over months and years, beds change. Common tasks include:
- Adding compost annually or between plantings
- Topping up soil as it settles
- Checking for wood rot or loose fasteners
- Rotating crops to help with pest and disease management
How intensive this care feels depends on what and how much you plant, and your climate.
Different Raised Bed Styles and When They Fit
Raised beds exist on a spectrum from “bare-bones DIY” to “permanent landscape feature.” Here are a few common styles:
1. Simple single-level wooden bed
- Look: Basic rectangle, one board high
- Effort: Low
- Cost: Usually lower
- Best for: Trying out raised beds, smaller spaces, annual vegetables
2. Tall or multi-tier wooden bed
- Look: Two or more boards high, sometimes stepped
- Effort: Moderate (more cutting and bracing)
- Cost: Higher (more materials and soil)
- Best for: People with mobility concerns, deeper-rooted crops, focal points in the yard
3. Metal panel bed
- Look: Clean, modern, corrugated or smooth panels
- Effort: Varies—often involves assembling pre-made panels
- Cost: Often moderate to higher depending on size
- Best for: Long-term installations, modern garden aesthetics, minimal wood maintenance
4. Stone or block bed
- Look: Solid, permanent, can match house or patio
- Effort: Higher (heavier materials, more leveling)
- Cost: Often higher upfront
- Best for: Long-term landscaping, decorative garden structures, retaining on slopes
Each style has its fans. The right one for you depends on how permanent you want the bed to be, how much you’re willing to lift and carry, and how much you care about matching your home’s look.
Common Questions About Building Raised Garden Beds
Do raised beds really reduce weeds?
Raised beds can reduce weeds, especially if:
- You start with clean soil (not full of weed seeds)
- You suppress existing grass and weeds under the bed
- You use mulch on top
They don’t eliminate weeds entirely. Windblown seeds, nearby plants, and birds can still introduce weeds. But compared with tilling a large in-ground plot, many people find raised beds easier to keep under control.
Do I need to line the inside of the bed?
Some people add liners like:
- Landscape fabric at the bottom or along sides
- Cardboard under the bed to smother grass
- Plastic sheeting on the sides (with drainage holes) to protect wood
Whether you line your bed depends on:
- Soil quality underneath
- Concern about roots from nearby trees
- Concern about chemicals in surrounding materials
- Desire to slow wood decay
A full plastic liner can trap water, so if you use one, drainage holes and careful design are important.
Can I put a raised bed on a balcony or deck?
Yes, but with extra care:
- Check the weight limits of the structure. Wet soil is very heavy.
- Use containers or beds with bottoms and good drainage.
- Protect surfaces from standing water and staining.
In these settings, many people build or buy planter-style raised beds designed specifically for decks and balconies, rather than open-bottom beds.
How to Decide What’s Right for You
By this point, you’ve seen there’s no single “right” way to build a raised garden bed. The best choice depends on your mix of:
- Goals: Food vs. flowers, experimentation vs. long-term setup
- Budget: Simple, low-cost wood vs. higher-priced, long-lasting materials
- Time and tools: Basic hand tools vs. more advanced building
- Space and sun: Full-sun yard, partial-shade side area, or only a small patio
- Physical needs: Lower beds you kneel next to vs. taller beds you can work from standing
As you plan, it can help to sketch a simple layout, measure the area, and start with one or two beds before committing to a full garden. Over time, you can adjust: build more beds, change materials, or alter your soil mix based on what you learn in your specific conditions.
The key is understanding the pieces: location, size, materials, soil, and care. Once you see how those fit together, you can make a raised bed that matches your own yard, body, and gardening style.