How to Paint a Room Like a Professional (Step-by-Step FAQ)
Painting a room looks simple: buy paint, roll it on, done. But if you’ve ever ended up with streaks, missed spots, or paint on the ceiling, you know there’s more to it.
This guide walks through how pros approach painting a room, what decisions they make along the way, and what you’ll need to think about for your specific space.
You’ll see:
- The full process from prep to cleanup
- The variables that change what’s “right” for your room
- Common paint types, finishes, and tools (and how they differ)
- What to check in your space before you start
FAQ: Painting a Room Like a Professional
What’s the basic professional process for painting a room?
Most professional painters follow a similar order:
Plan the job
- Choose paint type, color, and finish
- Estimate how much paint and how many coats
- Decide what needs repair (holes, cracks, stains)
Prepare the room
- Move or cover furniture
- Remove switch plates and outlet covers
- Protect floors and fixed items with drop cloths and tape
Prepare the surfaces
- Clean walls and trim
- Scrape loose paint, sand rough spots
- Fill holes and cracks, sand smooth
- Address stains or glossy areas with primer
Prime (if needed)
- Spot-prime repairs and stained areas
- Apply full primer coats in certain situations (e.g., big color changes)
“Cut in” edges
- Use a brush to paint along ceilings, corners, and trim
- Create a wet edge to blend with the roller
Roll the walls
- Work in sections (usually 3'×3' or so)
- Maintain a wet edge to avoid lap marks
- Apply 1–3 coats depending on coverage and color
Paint the trim and doors (often last)
- Use semi-gloss or satin
- Sand lightly between coats for a smooth finish
Touch up and clean up
- Check for missed spots and drips
- Remove tape carefully
- Clean brushes and rollers properly
The specifics—like how much prep is needed, whether you need primer, or how many coats of paint—depend on your walls, existing paint, and the room’s use.
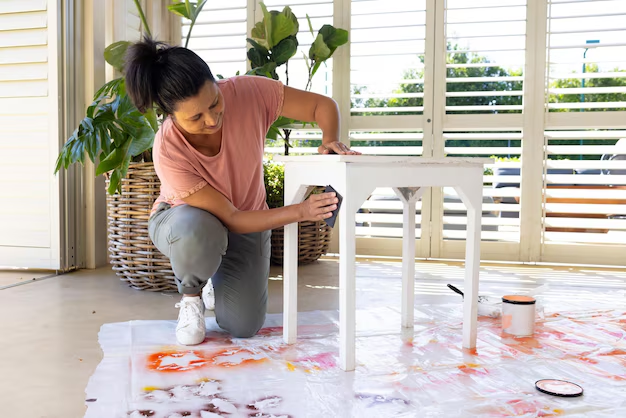
What should I do before I start painting?
Professionals spend a surprising amount of time on prep. That’s where most of the “pro look” really comes from.
Key prep questions to ask yourself:
What condition are my walls in?
- Smooth and clean
- Dented, cracked, peeling
- Greasy (kitchens), smokey, or stained
What’s on them now?
- Flat, eggshell, satin, or high-gloss
- Dark color you’re covering with light
- Possibly oil-based paint (often in older homes or on trim)
What’s in the room?
- Lots of furniture? Hard flooring vs. carpet?
- High traffic (entry, hallway) vs. low traffic (guest room)?
Basic pre-paint checklist:
- Remove or cover:
- Furniture moved to center or out
- Remove vent covers, outlet/switch plates, pictures, and nails you’re not reusing
- Protect:
- Use drop cloths or rosin paper on floors
- Tape off trim, windows, and any fixtures that can’t be removed
- Clean:
- Dust and cobwebs from corners and baseboards
- Degrease kitchen or kid-dirt walls with a mild cleaner
- Let surfaces dry fully
If you skip this step, even great paint and careful rolling won’t look professional.
Do I really need primer?
It depends. Professionals don’t prime everything by default, but they use primer when certain conditions are present.
Primer is especially important when:
- You’re covering a very dark color with a light one
- You see water stains, smoke stains, or crayon/marker
- Walls are glossy and you need better adhesion
- You’ve patched holes and want an even sheen
- You suspect oil-based paint (often on older trim and doors) and you’re switching to water-based
Common primer approaches:
| Situation | Typical Pro Approach |
|---|---|
| Small nail holes | Patch + spot-prime repairs |
| Patch-heavy or rough walls | Full prime coat for uniform look |
| Big color change | Tinted primer or an extra paint coat |
| Stains (smoke, water, markers) | Stain-blocking primer |
| Glossy existing paint | Light sand + bonding primer |
If you skip primer in situations where it’s needed, you’re more likely to see:
- Patch areas “flashing” (showing through differently in the light)
- Stains bleeding back through
- Peeling or poor adhesion in tricky spots
What kind of paint finish should I use on my walls and trim?
Paint “finish” or “sheen” refers to how shiny or matte it is. Pros choose finishes based on durability, washability, and how much wall flaws will show.
Common interior paint finishes
| Finish | Look & Feel | Typical Uses |
|---|---|---|
| Flat / Matte | No shine, soft look | Low-traffic rooms, ceilings, imperfect walls |
| Eggshell | Slight sheen, soft, more washable | Most living rooms, bedrooms, hallways |
| Satin | Soft shine, more durable | Kids’ rooms, family rooms, some kitchens/baths |
| Semi-gloss | Noticeable shine, very washable | Trim, doors, cabinets, high-moisture areas |
| Gloss / High-gloss | Very shiny and hard | Accent trim, some doors or furniture |
What pros weigh when choosing:
- Traffic level: High-traffic areas usually benefit from eggshell or satin.
- Wall condition: Flatter finishes hide flaws better; shinier finishes highlight them.
- Cleaning needs: Semi-gloss and satin are easier to wipe down than flat.
- Moisture: Bathrooms and kitchens often get more moisture-resistant, washable paints.
There’s no universal “best” finish—only what fits your room’s use, wall condition, and how you feel about shine vs. easy scrubbing.
What type of paint should I use: latex, acrylic, or oil-based?
These terms describe the base and resin of the paint, which affects how it behaves.
Latex (water-based) paint
- Common for most walls and ceilings
- Low odor compared to oil-based
- Easier cleanup with soap and water
- Dries faster
100% Acrylic (water-based)
- A “higher performance” version of water-based
- Better adhesion and flexibility than basic latex
- Often used where durability matters more
Oil-based (alkyd) paint
- Very durable and smooth
- Historically common for trim and doors
- Stronger odor, longer dry time
- Cleanup with solvents, not water
- Restricted or less common in some areas
Professionals often use water-based acrylic or latex for walls and ceilings, and either:
- High-quality water-based enamel for trim and doors, or
- Oil-based paint in some specific trim or restoration cases
Your choice may be shaped by:
- Local rules about oil-based paints
- Existing paint type (water-based over old oil-based needs special prep)
- How much odor and cleanup effort you’re OK with
How do I choose the right paint color?
Pros look beyond “pretty color” and think about light, mood, and existing elements.
Things that influence color choice:
- Natural light
- North-facing rooms: light is cooler; colors can look more gray/blue
- South-facing rooms: light is warmer; colors can feel more yellow or golden
- Artificial light
- Warm bulbs can make colors look more yellow
- Cool bulbs can make them look sharper or bluer
- Existing finishes
- Flooring color, trim color, cabinets, and fixed furniture change how a color looks
- Room size and feel
- Lighter colors can feel more open
- Darker colors can feel cozier or more dramatic
- Sheen
- Higher sheen reflects more light and can intensify color
What many people do before committing:
- Use sample pots or peel-and-stick swatches
- Test on multiple walls and check at different times of day
The “right” color depends on your taste, how you use the room, and what’s already in it.
What tools and supplies do professionals use?
You don’t need the most expensive gear, but pros rely on certain types of tools:
Basic tools:
- Roller frames and extension poles
- Roller covers (nap thickness matched to your wall texture)
- Angled sash brush (commonly 2"–2.5" for cutting in)
- Paint tray or bucket with a roller screen
- Step ladder
- Drop cloths (cloth or plastic)
Prep supplies:
- Painter’s tape
- Spackle or joint compound
- Putty knife
- Sandpaper or sanding sponge (various grits)
- Caulk and caulk gun for gaps at trim
- Cleaning supplies (mild degreaser, rags, sponge)
Roller cover comparison
| Wall Surface | Typical Roller Nap (Thickness) |
|---|---|
| Very smooth (new drywall) | Short nap (around 1/4"–3/8") |
| Light texture (orange peel) | Medium nap (around 3/8"–1/2") |
| Heavier texture | Longer nap (around 1/2"–3/4"+) |
The nap length affects how much paint the roller holds and how well it gets into texture. Too short on a textured wall = patchy coverage. Too long on a smooth wall = unnecessary texture.
How do professionals get such clean lines at the ceiling and trim?
Two main techniques show up in pro work:
Careful “cutting in” with a brush
- Use a quality angled brush
- Load the brush moderately; don’t overload
- Keep a light touch and use your hand as a “rest” against the wall or ceiling
- Move steadily instead of stopping and starting every inch
Painter’s tape (used well)
- Press tape down firmly, especially along the paint edge
- Some people lightly “seal” tape edges with the base wall color before painting the new color on top
- Remove tape while paint is still slightly tacky, pulling at an angle
Not everyone has a steady hand, so how much you rely on taping vs. freehand cutting in depends on your comfort level and how crisp you want the lines to be.
What’s the right order to paint: ceiling, walls, or trim first?
Many professionals follow this order for a standard room:
- Ceiling
- Walls
- Trim, baseboards, and doors
Why this order makes sense:
- Ceiling drips and splatter can be covered when you do the walls
- Wall mistakes near trim can be cleaned up as you paint trim
- Trim is usually more detailed, so it benefits from finishing last, against already-painted walls
In practice, the order can shift if:
- You’re only painting walls
- Trim is being heavily repaired or replaced
- You’re spraying vs. brushing/rolling
How many coats of paint do I need?
The number of coats depends on:
Color change
- Light over dark often needs more coats
- Dark over light can cover faster but may still need multiple coats for richness
Paint quality and type
- Higher-quality paints often cover better per coat
- Some paints are marketed as “one coat,” but coverage still varies with conditions
Surface condition and primer use
- Primed, even surfaces usually need fewer coats than patchy or glossy surfaces
Common real-world patterns:
- Neutral over neutral: often 1–2 coats
- Light over dark: more likely 2–3 coats
- Big sheen change (e.g., glossy to flat) without primer: more variation in how many coats it takes to look even
Professionals often plan for at least two finish coats on walls for even color and depth, especially when quality matters more than saving a bit of time or paint.
How do I avoid streaks, lap marks, and roller lines?
These common issues mostly come down to technique and timing.
Key practices pros use:
Maintain a wet edge
- Work in manageable sections
- Overlap each new roller pass into the still-wet edge of the last one
Load the roller evenly
- Roll off extra paint in the tray or bucket screen
- Avoid “globs” and dry roller marks
Use the right pressure
- Too much pressure squeezes paint out unevenly
- Let the roller do the work, with just enough pressure to keep contact
Roll in a consistent pattern
- Many pros use a “W” or “M” pattern, then fill in, always finishing with light, long strokes in one direction
Don’t go back over drying paint
- Touching up partly dry areas is one of the fastest ways to create lap marks
Your room’s temperature, humidity, and airflow also matter—very hot, dry conditions make paint dry faster and give you less time to blend edges.
How long should I wait between coats?
Dry time depends on:
- Paint type (water-based vs. oil-based)
- Humidity and temperature
- Ventilation
Most paint cans list a “recoat time” range. Professionals pay close attention to this because recoating too soon can cause:
- Tacky surfaces
- Poor adhesion
- Uneven sheen
On the flip side, waiting longer than needed usually doesn’t hurt the paint itself—it just delays the project. The exact wait you choose will depend on your schedule and your room’s conditions; the product label is your best guide.
How do I handle repairs, cracks, and holes like a pro?
Professional-looking walls are as much about prep work as paint.
Common repairs and typical approaches:
Small nail holes
- Fill with lightweight spackle
- Let dry, sand smooth, spot-prime if needed
Larger holes and dents
- Use joint compound or patching compound
- For bigger holes, use a patch kit
- Sand smooth and possibly apply more than one layer
Cracks along corners or at trim
- Usually caulked (flexible) vs. filled with hard compound
- Smooth caulk with a damp finger or tool, then paint
Peeling or flaking paint
- Scrape loose areas
- Sand edges smooth
- Prime before repainting
The more damaged or uneven your walls, the more time you’ll spend here—and that’s often what separates a “fresh coat of paint” from a room that actually looks professionally redone.
How do I keep paint off my floors, furniture, and fixtures?
Pros protect more than they paint.
Typical protection steps:
Floors
- Canvas drop cloths help prevent slips and soak up drips
- For hard floors, some use rosin paper or plastic plus tape at edges
Furniture
- Move pieces to the center
- Cover completely with plastic or sheets
Fixtures and hardware
- Remove what you can: outlet covers, switch plates, some light fixtures
- Tape around what can’t be removed
Windows and trim
- Use painter’s tape along glass edges
- Tape can also help if your hand isn’t steady for cutting in
How much you protect depends on:
- Floor type (carpet vs. hard surface)
- How confident you are about avoiding drips
- Whether a bit of cleaning afterward is acceptable to you
How do I clean up and store leftover paint properly?
Clean, careful wrap-up keeps your tools usable and your space safe.
Brushes and rollers:
- Water-based paints:
- Rinse in warm, soapy water until clear
- Oil-based paints:
- Use appropriate solvent as directed on the can
- Spin or shake out excess water, reshape bristles, and hang or lay flat to dry
Leftover paint:
- Wipe the rim of the can clean
- Tap the lid on firmly all the way around
- Store in a cool, dry place away from extreme heat or freezing
- Label with room name and date so you know what it’s for later
Disposal:
- Fully dried latex paint is often treated differently from wet paint; rules vary by location
- Oil-based products are usually treated as hazardous waste
- Local guidelines or recycling centers can tell you what’s accepted where you live
How you handle cleanup may depend on:
- Whether you plan on regular touch-ups
- Storage space
- Local disposal rules and environmental preferences
How do I know if I should paint myself or hire a professional?
This is where your own situation really comes into play. Some people enjoy DIY painting; others mainly want it done fast and flawlessly.
Factors to consider:
Room size and complexity
- Tall ceilings, lots of trim, and built-ins are more demanding
Wall condition
- Basic scuffs are manageable; heavy repairs or old peeling paint are more involved
Your time and energy
- Prep, painting, and cleanup can take longer than many people expect
Your comfort with ladders and detail work
- Cutting in high ceilings or stairwells can be tricky and physically demanding
Your expectations for the finish
- “Good enough” for a spare room vs. “showroom smooth” in the main living space
Understanding the full professional process gives you a clearer picture of what’s involved. From there, you can decide what you’re comfortable handling yourself and where, if anywhere, you’d rather bring in help.