How To Install Crown Molding: A Step‑By‑Step Guide for Homeowners
Installing crown molding is one of those interior updates that can make a room look more finished and upscale without changing anything else. It’s also a project many handy homeowners tackle themselves.
Whether that makes sense for you depends on your tools, your comfort with precise measuring and cutting, and the shape and condition of your room. This guide walks through how crown molding installation works, what decisions you’ll need to make, and where the process gets tricky.
What Is Crown Molding, Exactly?
Crown molding is a decorative trim installed where the wall meets the ceiling. It can:
- Hide minor gaps or imperfections at the wall–ceiling joint
- Add architectural interest in otherwise plain rooms
- Help visually “finish” cabinets, built-ins, or fireplaces
Crown molding comes in different materials and profiles (shapes), which affect cost, difficulty, and durability.
Common crown molding materials
| Material | Pros | Cons / Considerations | Typical Use Cases |
|---|---|---|---|
| MDF | Affordable, smooth, easy to paint | Not ideal in damp areas; can swell if wet | Living rooms, bedrooms, hallways |
| Pine/softwood | Easy to cut, can be painted or stained | Softer, dents more easily | General interior, budget-friendly wood look |
| Hardwood | High-end look, stains beautifully | More expensive, harder to cut accurately | Formal rooms, high-visibility spaces |
| Polystyrene/foam | Very light, easy to glue, DIY-friendly | Can damage more easily; looks cheaper up close | Quick updates, rentals, low-stress projects |
| PVC/polyurethane | Moisture-resistant, good for baths/kitchens | Can flex; needs correct adhesives/fasteners | Bathrooms, kitchens, humid climates |
How “right” any of these are depends on your room, budget, and whether you want to paint or stain.
Is Installing Crown Molding a DIY Job?
For many people, yes—but it’s not a beginner’s very first project. The challenge is less about strength and more about precision.
You’ll be measuring, cutting, and fitting pieces at angles, often in rooms that aren’t truly square. That means:
- Tiny measuring errors can show up as big gaps
- You may need to cope with out-of-level ceilings and wavy walls
- You’ll be working on a ladder for long stretches
People who tend to do well with this project:
- Already comfortable with a miter saw
- Are patient with “measure twice, cut once” work
- Don’t mind some trial and error and extra caulk
If that’s not you right now, it doesn’t mean you can’t do it—it just affects how fast you’ll go and how “perfect” your expectations should be.
Tools and Materials You’ll Typically Need
The exact list changes based on your material and approach, but most DIY installations use some version of:
Tools:
- Miter saw (ideally with adjustable bevel)
- Tape measure and pencil
- Stud finder
- Level or laser level
- Caulk gun
- Coping saw (if you choose coping for inside corners)
- Nail gun (brad or finish) or hammer and finish nails
- Safety glasses and hearing protection
- Ladder or sturdy step stool
Materials:
- Crown molding (enough linear feet plus extra for mistakes and waste)
- Construction adhesive (optional but common)
- Finish nails or brads
- Wood filler or spackle
- Paintable caulk
- Primer and paint or stain (if finishing on site)
Some people buy pre-primed molding to save time. Others pre-paint or pre-stain before installation; that choice is mostly about your working style and how much touch-up you’re comfortable doing overhead.
Key Concepts: Spring Angle, Corners, and Orientation
Before cutting anything, it helps to understand a few basic terms you’ll see in tutorials and packaging.
Spring angle
Crown molding doesn’t sit flat against the wall or the ceiling; it sits at a tilted angle between them. That tilt is the spring angle (commonly around 38–45 degrees, but it varies by profile).
- The spring angle affects how you set your molding in the miter saw
- Many manufacturers print the spring angle on the back of the molding or on labels
If you mix different profiles or brands in the same room, the spring angles might not match, making neat joints harder.
Inside vs. outside corners
Crown molding wraps around the room, so you’ll deal with:
- Inside corners – where two walls meet and “fold in”
- Outside corners – where a corner “sticks out” into the room (like a chimney or column)
Both require angled cuts, but they’re opposite directions. This is where a lot of mistakes happen, simply because it’s mentally easy to flip an angle the wrong way.
Coping vs. mitering corners
You have two main approaches for inside corners:
Mitered joints
- You cut both pieces at angles (often 45°) and fit them together
- Looks good in theory, but real-world walls rarely form perfect angles
- Small gaps are common if the corner isn’t truly square
Coped joints
- One piece runs straight into the corner
- The other is cut with a coping saw to follow the profile of the first piece
- The coped piece “overlaps” and hides slight imperfections in wall angle
Coping has a steeper learning curve but often gives tighter corners in older or uneven houses. All-mitered corners are simpler conceptually and are common with foam or lightweight molding.
Planning Your Crown Molding Layout
A thoughtful plan helps avoid awkward seams and short offcuts in visible spots.
Step 1: Measure the room
- Measure each wall’s length (inside corner to inside corner)
- Note any outside corners (like bump-outs or columns)
- Add up total linear feet and then add extra for:
- Bad cuts and mistakes
- Waste from angled cuts (especially with large molding)
You don’t need an exact percentage; just understand you’ll need more than the bare wall length.
Step 2: Decide where seams will go
Unless your walls are very short, you may have to join two pieces along a wall. Where possible:
- Put seams on less noticeable walls
- Avoid seams in short wall sections close to corners
- Use a scarf joint (angled cut where two pieces overlap) instead of a straight butt joint—it hides better
Step 3: Plan your starting point
Most installers like to:
- Start on the wall you see least when entering the room
- Work their way around the room in one direction (clockwise or counterclockwise)
That way, any less-than-perfect copes or seams are less visible in the primary view.
How To Install Crown Molding: Step‑By‑Step
Below is a typical workflow. Individual methods vary, especially around how corners are cut, but the general arc is similar.
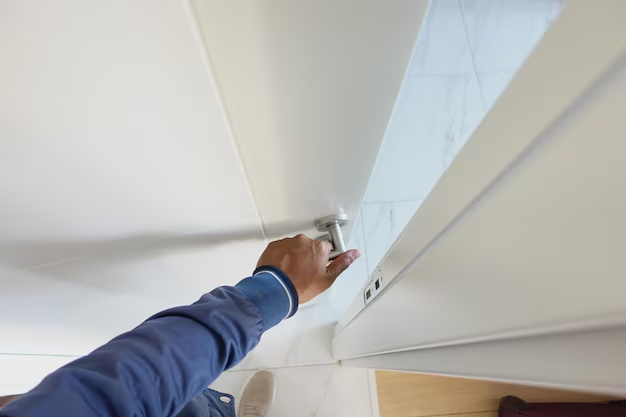
1. Locate studs and mark guidelines
- Use a stud finder to mark studs along the top of each wall
- Lightly mark a reference line on the wall or ceiling that shows where the bottom or top edge of the crown should land
- A laser level or long level can help make this line consistent around the room
- These marks help with both alignment and nailing
Rooms with very uneven ceilings may need you to “split the difference” visually (following what looks straight to the eye rather than the absolute ceiling line).
2. Pre-finish (optional but common)
A lot of people find it easier to:
- Prime and apply first coat of paint or stain to the molding before cutting or installing
- Do touch-ups and caulking after everything is up
This reduces the amount of painting you’re doing overhead on a ladder.
3. Cut and install your first piece
Select a wall with simple ends (no outside corners if possible).
- Measure the wall length
- Transfer that measurement to your first piece of crown
- Set your miter saw:
- For mitered corners, you’ll usually either:
- Lay the crown at its installed angle against the saw fence
- Or cut it flat on the table with both miter and bevel angles set based on your spring angle
- Many DIYers find it easier to hold the crown in the saw exactly as it will sit between wall and ceiling
- For mitered corners, you’ll usually either:
- Cut each end as needed:
- Straight (square) cut if it ends at a door casing or you’ll cope into it
- Mitered cut if it meets another mitered piece in a corner
Then:
- Apply construction adhesive sparingly on the back (optional, but often used with foam or when stud spacing is tricky)
- Fit the piece into place along your guideline
- Nail into studs and, if possible, into the top plate behind the wall:
- Use a nail gun with finish nails/brads
- If using a hammer, pre-drilling can help prevent splitting
Don’t overdrive nails; you want them slightly set but not crushing the molding.
4. Handle inside corners: cope or miter
For coped inside corners (common with wood or MDF):
- Install one piece tight into the corner with a square end
- For the mating piece:
- Cut a 45° miter so the profile is revealed
- Use a coping saw to cut along the profile line, angling slightly back so the front edge is clean
- Test-fit, trim, and sand as needed until it sits snugly over the first piece
For mitered inside corners (common with foam/PVC or perfectly square walls):
- Cut both joining pieces with equal but opposite miter angles
- Test-fit both before nailing fully to see how the joint looks
- Adjust angles slightly if you see gaps (some corners are closer to 88° or 92° than 90°)
Neither method is “right” for everyone; coping is more forgiving of imperfect walls, mitering is conceptually simpler.
5. Handle outside corners
Outside corners use mitered joints:
- Measure from the last inside corner to the outside corner’s outer edge
- Cut each piece with opposite miters so they meet at the outside corner
- Test fit, adjust as needed, then glue and nail cautiously—outside corners are easy to bump, so many people add a bit of adhesive here
If the corner isn’t truly square, even small angle adjustments on the saw can make a big difference in how tight the joint looks.
6. Create and place seams (scarf joints)
Where two pieces meet along a straight wall:
- Cut matching miters so one overlaps the other (both leaning the same way along the wall)
- Install the first piece
- Overlap the second piece slightly and glue the joint
- Nail near the joint to hold it steady as the adhesive cures
Scarf joints tend to be less visible once painted than simple butt joints.
7. Work your way around the room
Continue:
- Measuring each wall
- Deciding whether to cope or miter each corner
- Cutting, test-fitting, and then nailing pieces in place
The last piece can be the trickiest because it must fit between two fixed points. Many DIYers:
- Cut it slightly long
- Shave off tiny amounts until it just presses into place
Patience helps more than force here.
Filling, Caulking, and Finishing for a Clean Look
Even pro jobs usually need touch-up. The difference between “good” and “great” often comes down to this step.
Fill nail holes and small gaps
- Use wood filler or spackle for:
- Nail holes
- Tiny dents or dings
- Once dry, sand flush with the surface
Caulk gaps at the wall and ceiling
- Run a thin bead of paintable caulk along:
- The top edge where molding meets ceiling
- The bottom edge where it meets wall
- Small corner gaps or seams that didn’t close perfectly
- Smooth with a damp finger or caulk tool, wiping away excess
Caulk is not a band-aid for major misfits, but it does hide small shadows and hairline gaps, especially in older homes.
Final painting or staining
Depending on your earlier choice:
- Painted crown:
- Prime any raw wood or filler areas
- Apply a final coat (or two) of paint
- Many people like a semi-gloss or satin to match other trim, but finish level is a style choice
- Stained crown:
- Stain and clear-coat any sanded/filler areas carefully
- Matching stain on patched spots can be trickier than with paint
If your walls or ceiling also need repainting, the order of operations matters. Many people:
- Paint ceiling and walls first
- Install crown
- Touch up wall/crown edges together
There’s no single “right” order; it depends on how much repainting you’re planning.
Common Challenges and How People Typically Handle Them
Every house adds its own twist. Here are issues that come up a lot and the general approaches people consider:
Uneven or wavy ceilings
- What happens: Gaps appear at top or bottom of molding in certain spots
- Typical responses:
- Follow what looks visually straight rather than hugging every dip in the ceiling
- Use caulk to bridge small gaps
- For big waves, some people shim behind molding—this is more advanced
Out-of-square corners
- What happens: Standard 45° cuts leave noticeable gaps
- Typical responses:
- Adjust miter angle a few degrees either way to better match the actual corner
- Use coped joints on inside corners to hide imperfect angles
- Accept that older homes may never look machine-perfect and lean on caulk for tiny discrepancies
Limited tools
If you don’t own a miter saw or nail gun:
- Some people:
- Rent tools for a day or weekend
- Use lightweight foam or polystyrene crown that cuts with a handsaw or knife and attaches mostly with adhesive
- Hand-cutting wood with a miter box and hammering finish nails is possible, just slower and more physically demanding
High ceilings or tall profiles
- Working on tall ladders or scaffolding adds a safety layer to this project
- Larger profiles are heavier and need more precise support and nailing
- Some people prefer to start with smaller molding or tackle only standard-height rooms themselves
When People Typically Call in a Pro
There’s no hard rule for when DIY crosses into “better to hire,” but common tipping points include:
- Very intricate or large-profile moldings
- Historic homes with dramatically uneven ceilings
- Vaulted or angled ceilings
- Complex rooms with many outside corners, bays, or built-ins
- Lack of tools and no desire to rent or learn them
A professional trim carpenter brings experience that minimizes waste, speeds up the job, and often produces cleaner corners—but that decision depends on your budget, time, and how much you enjoy hands-on work.
What To Think Through Before You Start
Installing crown molding is very doable for many homeowners, but the best approach depends on your situation. Key things to weigh:
- Room shape and condition
- Are walls fairly square and ceilings fairly flat, or obviously wavy and out-of-level?
- Material choice
- Do you need moisture resistance (bathrooms, kitchens)?
- Are you planning to paint (MDF/foam okay) or stain (real wood almost always)?
- Tool access and comfort
- Do you have or plan to use a miter saw and nail gun?
- Are you okay working on ladders for extended periods?
- Detail level you care about
- Are you aiming for “looks good from 3 feet away” or “crisp enough to impress a trim carpenter”?
- Time and patience
- Can you live with some trial-and-error cuts, or do you need a fast, first-try-perfect solution?
Understanding how crown molding installation works—and where it tends to get tricky—puts you in a better position to decide how much you want to take on yourself, what materials and methods fit your home, and where it might be worth simplifying your design or bringing in help.