How to Finally Organize Your Pantry (and Keep It That Way)
A truly organized pantry doesn’t have to look like a magazine spread. What matters is that you can see what you have, reach what you use, and stop buying duplicates.
“Once and for all” doesn’t mean you’ll never touch it again. It means you set up a simple system that works for your household, and then light, regular upkeep keeps it running.
This guide walks through how pantry organization works, the choices you’ll need to make, and what to think about for your own space and habits.
Why Pantry Organization Matters (Beyond Looking Pretty)
At its core, organizing your pantry is about making your food easy to find, use, and maintain. When a pantry works, you’re more likely to:
- Use what you buy before it expires
- Cook at home more easily
- Spend less on duplicates and “just in case” items
- Cut down on food waste and clutter
Different homes will care about different benefits. For example:
- A busy family may care most about grab-and-go snacks being easy to see.
- A small apartment may care more about using every inch of space.
- A serious home cook may want quick access to a wide variety of ingredients.
The steps below are the same for almost everyone, but how you do each step changes based on your space, budget, and routines.
Step 1: Get Clear on Your Pantry “Profile”
Before you touch a shelf, it helps to understand what kind of pantry you’re working with and how you use it.
Key variables that shape your pantry system
Ask yourself:
- What kind of space is it?
- Walk-in pantry
- Reach-in closet
- Cabinet or a couple of cupboards
- Open shelving in the kitchen
- Who uses it regularly?
- Adults only
- Kids who need safe, easy access
- Housemates or extended family
- What do you actually store there?
- Just dry foods?
- Also small appliances?
- Bulk paper goods and cleaning supplies?
- How often do you cook and shop?
- Daily cooking vs. mostly takeout
- Weekly grocery trips vs. bulk shopping every few months
These answers affect:
- How much “back stock” (extras) you can reasonably store
- Whether you need kid-friendly zones
- How important labels and clear containers are for your household
- How many categories you really need (simpler is usually better)
You don’t have to decide anything yet. Just keep these in mind as you go.
Step 2: Empty and Sort – The Hardest but Most Important Part
To organize “once and for all,” you need a fresh start.
1. Empty the pantry (in sections if needed)
If emptying everything at once is overwhelming, work one shelf or zone at a time. The goal is to actually see what you own.
As you pull items out, group similar things together on your counter or table:
- Baking supplies
- Breakfast items
- Canned goods
- Pasta, rice, grains
- Snacks
- Oils and vinegars
- Condiments and sauces
- Mixes and “just add water” meals
- Beverages and drink mixes
The exact categories depend on what you buy. The idea is simply “like with like.”
2. Toss, donate, or repurpose
As you sort, make quick decisions:
- Expired or clearly stale?
- Discard safely.
- Still good but nobody eats it?
- Consider donating unopened, in-date items if allowed where you live.
- Very old “just in case” items?
- Decide if “just in case” is actually serving you or just taking space.
This is where you decide what’s truly welcome in your pantry going forward. If you keep everything, no system will feel organized for long.
Step 3: Decide Your Pantry Zones (Your “Map”)
Now that you see what you have, you can design zones. Zones are simply designated spots for each type of item. A basic pantry might have:
- Everyday cooking zone (oils, salt, common spices, pasta, rice)
- Breakfast zone (cereal, oats, spreads)
- Baking zone (flour, sugar, baking soda, chocolate chips)
- Snacks zone
- Canned goods zone
- “Back stock” zone (extras and refills)
How to place your zones
Use this simple rule: Prime real estate = things you reach for often.
- Eye-level and middle shelves
- Everyday items, snacks, kids’ snacks (if that’s allowed), breakfast
- High shelves
- Back stock, rarely used appliances, seasonal baking items
- Low shelves
- Heavier items (bottled drinks, bulk flour, pet food), kid-friendly baskets if you want them to self-serve
Here’s how different households might set their zones:
| Pantry Profile | Zone Priorities |
|---|---|
| Young family with kids | Kid snack shelf, breakfast at eye level, adult-only snacks/appliances higher |
| Serious home cook | Large cooking zone, extensive spices, grains and legumes front and center |
| Tiny apartment pantry | Multi-purpose zones, fewer categories, strict limit on back stock |
| Bulk shopper | Dedicated back stock area, clear rotation system, extra labels for duplicates |
You don’t have to copy anyone else’s layout. The goal is: if someone asked “Where does this go?” you’d have one clear answer.
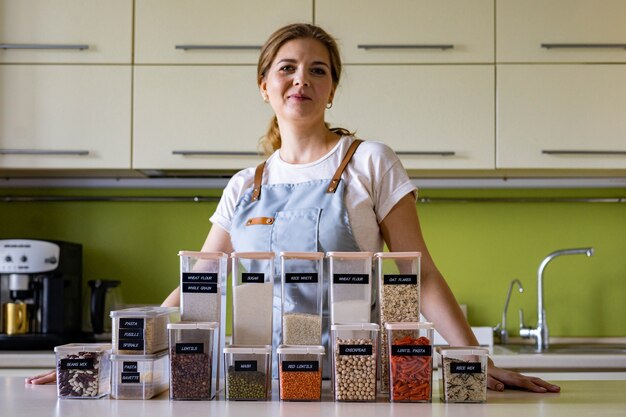
Step 4: Choose Containers (Or Not) on Purpose
You don’t need a closet full of matching bins to be organized. Containers are tools, not requirements.
Common container options and when they help
| Type of Container | Best For | Pros | Watch Out For |
|---|---|---|---|
| Clear bins / baskets | Loose snacks, packets, grouped categories | Easy to see, pulls out like a drawer | Can become junk drawers if overstuffed |
| Airtight canisters | Flour, sugar, rice, pasta, baking staples | Keeps food fresh, easy to scoop | Takes time to refill, costs add up |
| Lazy Susans (turntables) | Oils, vinegars, sauces, condiments | Uses deep corners, easy access | Tall items can tip if overcrowded |
| Tiered risers | Canned goods, jars, spices | Lets you see items in back rows | Needs measuring to fit correctly |
| Door racks | Spices, small bottles, snacks, wraps/foils | Adds storage in small spaces | Can be unstable with heavy items |
Variables to think about:
- Budget – You can organize well with simple boxes, repurposed containers, or just neat rows.
- Maintenance style – If you hate refilling containers, you may prefer to keep items in their original packaging.
- Who’s using it – Kids and guests tend to do best with clear, obvious categories and labels.
Many people find a hybrid approach works well: canisters for things used constantly (like flour or rice), and original packaging neatly grouped in bins for everything else.
Step 5: Label in a Way You’ll Actually Follow
Labels aren’t about being cute; they’re about making it easy to put things back in the right spot.
You can use:
- Pre-printed labels or a label maker
- Painter’s tape and a marker
- Handwritten tags
What to label:
- Bins and baskets (e.g., “Chips,” “Pasta & Rice,” “Baking,” “School Snacks”)
- Canisters (name + date you opened it or best-by date)
- Shelves for general zones, if that helps (“Breakfast,” “Cans,” “Back Stock”)
If multiple people use the pantry, labels are extra powerful. They answer the constant question: “Where does this go?” without you having to explain it again and again.
Step 6: Put Items Back with a “Storefront” Mindset
As you return items to the pantry, think like a tiny grocery store manager:
- Face labels forward so you can quickly see what’s what.
- Group by category and stick to it, even if it means shuffling a few things around.
- Leave a bit of breathing room in each zone whenever possible. A completely packed shelf is harder to maintain.
A simple rule that helps: one category per shelf or per bin. Not “snacks and also batteries and also candles.” Once different categories mix, chaos usually follows.
Step 7: Make a Simple System for Extras and Expiration
Even the prettiest pantry falls apart without a plan for extras and expiration dates.
“One in use, rest in back” system
For most households, an easy approach is:
- Keep one “active” item (like an open bottle of ketchup) in the main zone.
- Store duplicates or extras together in a back stock area.
- When you open a new one, move that item into the main zone and note the lower quantity in your head or list.
This applies to things like:
- Oils and condiments
- Pasta, rice, canned goods
- Snacks you buy in bulk
First In, First Out (FIFO) basics
You don’t need a complicated system, just a simple habit:
- New items go behind older ones of the same type.
- When restocking, quickly glance at dates and put the soonest-to-expire items in front.
Some people also:
- Use a “use first” bin or front row for items close to their best-by date.
- Mark open dates on items that go stale quickly (chips, crackers, nuts).
The right level of detail depends on how concerned you are about waste and how much time you’ll realistically spend on this.
Step 8: Plan for Real Life: Maintenance, Not Perfection
No pantry stays “perfect.” The goal is to keep it functional with minimal effort.
Light, regular habits that make the system last
Consider habits like:
- One-minute glance before each grocery trip
- Check what’s already on hand, especially pantry staples.
- Five-minute tidy once a week
- Push older items forward, toss empty packages, return stray items to their zones.
- Slight reset every few months
- Choose one or two shelves to re-sort, especially high-traffic areas like snacks.
Your own reality matters:
- If you have young kids, you might accept a “good enough” snack bin that gets neatened occasionally, rather than a perfectly sorted one.
- If you’re short on time, you might rely more on bigger groupings (one large “snacks” bin instead of several tiny categories).
Organized doesn’t have to mean “Instagram-worthy.” It means you can find what you need when you need it.
Frequently Asked Questions About Organizing Your Pantry
How do I start organizing a very messy pantry?
A messy pantry is normal; it just means you haven’t had a system that fits your life yet.
A practical way to start:
- Pick one shelf or one category (like “all snacks”) instead of the whole pantry.
- Empty that section.
- Toss expired or unwanted items.
- Group what’s left into simple categories.
- Put items back in a way that makes sense for how you cook and snack.
Repeating this shelf by shelf usually feels more manageable than an all-day overhaul.
Do I really need matching containers to be organized?
No. Matching containers are optional. They can be helpful if:
- You buy the same staples in bulk (rice, flour, sugar, oats)
- You want to protect items from pests or humidity
- You like the look and feel more motivated by it
But many people stay very organized using:
- Original packaging
- Simple, sturdy bins or boxes
- Clear labels and consistent zones
The system (where things live and how they flow in and out) matters more than the aesthetics.
How should I organize a small or cabinet-only pantry?
In a small space, the main challenges are depth and visibility. A few tricks that often help:
- Use tiered risers for cans or jars so you can see the back row.
- Treat deep shelves like drawers by using bins you can pull out.
- Store rarely used items higher or in another area to free up prime space.
- Limit how many duplicates you keep on hand.
You may need fewer, broader categories (e.g., one “dinners and sides” bin) to make the most of limited space.
How do I keep kids from wrecking the pantry?
Kids and pantries can happily coexist if the system matches their behavior:
- Give them clearly labeled snack zones that are okay to rummage through.
- Use sturdy bins instead of delicate containers.
- Put kid-friendly items low and accessible, and anything off-limits higher up.
- Accept that their zones will get messy; focus on quick resets, not constant perfection.
The more you design with their habits in mind, the better the system will hold up.
What should I not store in the pantry?
Some items don’t do well in a warm or humid pantry. General examples (always follow package guidance and local food safety advice):
- Certain oils and nuts may last longer in the fridge, especially once opened.
- Some baked goods (like fresh bread) can mold quickly in a warm pantry.
- Potatoes and onions often do better in a cool, dry, well-ventilated spot—separated from each other.
When in doubt, check the package and follow storage instructions that fit your climate and household.
How often should I re-organize my pantry?
There’s no universal schedule. It depends on:
- How many people use it
- How often you cook
- How much turnover you have in your food
Many people find it practical to:
- Do small tidies weekly or biweekly
- Do a more thorough sort and shelf wipe-down every few months
- Do a bigger reset when life changes (new baby, new diet, move, or seasonal cooking shifts)
You’ll know it’s time for a reset when you start losing track of items again or buying duplicates regularly.
What’s the simplest possible pantry system that still works?
If you want minimal effort, a basic, low-maintenance setup might look like:
- 4–6 big categories (e.g., Breakfast, Snacks, Cans, Dinner Staples, Baking, Back Stock)
- One bin or shelf for each category
- Labels on each zone
- New items always tucked behind older ones
This doesn’t require fancy supplies and is easy for most people in the household to understand and follow.
Getting your pantry organized “once and for all” is really about setting up a clear, simple structure that matches your reality, then giving it small nudges back on track over time. The exact containers, labels, and layout are up to you; the key is that everything has a home, and that home makes sense for how you actually live.