How To Prevent Frozen Pipes In Winter: A Practical Homeowner’s Guide
Frozen pipes are one of those winter problems that seem small—until they burst. Then you’re looking at water damage, emergency plumbing bills, and a lot of stress.
This guide walks through how frozen pipes happen, what makes your home more or less at risk, and the practical steps people commonly use to prevent them. It won’t tell you exactly what you should do, but it will give you the landscape so you can decide what makes sense for your home, budget, and climate.
What actually causes pipes to freeze?
Understanding the “why” makes the “how to prevent it” much easier.
Pipes freeze when:
- The temperature around the pipe drops below freezing for long enough
- Water inside the pipe isn’t moving much
- The pipe is in a vulnerable location (like an exterior wall, crawl space, unheated basement, or attic)
When water freezes, it expands. That expansion can put a lot of pressure on the pipe walls. Often, the pipe doesn’t burst where it’s frozen; it bursts at a weak point where the pressure builds up.
Key risk factors
Different homes have different weak spots. Common risk factors include:
Climate
- Areas with long, severe winters face more sustained cold
- Warmer climates are risky in a different way: homes there often have poorly insulated or exposed pipes because freezing is less common
Pipe location
- Pipes in unheated areas: crawl spaces, garages, attics, uninsulated basements
- Pipes in exterior walls, especially if insulation is thin or patchy
- Outdoor plumbing: hose bibs (outside faucets), irrigation lines, pool lines
Pipe material
- Copper and galvanized steel conduct cold more quickly
- PEX (flexible plastic) is more tolerant of freezing but not immune
- Older pipes may have weak spots from corrosion or previous repairs
Home design and age
- Older houses often have:
- Pipes closer to exterior walls
- Less insulation in walls, crawl spaces, and basements
- Additions or DIY remodels may have unusual pipe routes or “patched in” lines that are more exposed
- Older houses often have:
Knowing which of these apply to your place is the first step in choosing prevention methods.
How can I tell if my pipes are at risk of freezing?
You can’t change your climate, but you can look for risk signs around your home.
Common warning signs
- Rooms that are noticeably cold compared to the rest of the house
- Cabinets that feel icy inside (under sinks on exterior walls)
- Exposed pipes you can see in:
- Basements
- Garages
- Crawl spaces
- Attics
- Outdoor faucets that aren’t frost-free or aren’t protected
- Drafts or cold spots where pipes run through walls or floors
You can also watch for early symptoms when temperatures drop:
- Slower water flow from a faucet on a cold exterior wall
- No water from a particular tap, while others still work
- Frost or condensation on exposed pipes
Most common ways to prevent frozen pipes (and how they differ)
There isn’t one “right” method. Homeowners usually combine several of these, depending on budget, climate, and how permanent they want the fix to be.
Here’s a high-level comparison:
| Approach | Typical Use Case | Cost Level* | Permanent vs. Temporary | Main Benefit |
|---|---|---|---|---|
| Pipe insulation | Exposed pipes in basements, crawl spaces, garages | Low–Medium | Semi-permanent | Slows heat loss, basic long-term protection |
| Heat tape/heat cable | High-risk pipes that still get too cold | Medium | Semi-permanent | Actively warms pipe during cold snaps |
| Seal drafts & add insulation | Walls, crawl spaces, attics, around penetrations | Medium–High | Permanent | Reduces freezing risk and energy loss |
| Letting faucets drip | Short-term, during severe cold | Low | Temporary | Keeps water moving, relieves pressure |
| Opening cabinet doors | Under-sink pipes on exterior walls | None | Temporary | Lets room heat reach pipes |
| Shutting off & draining lines | Outdoor/seasonal plumbing | Low–Medium | Seasonal but repeatable | Removes water so nothing can freeze |
*“Cost level” here is relative and general, not a quote or guarantee.
Below, we’ll walk through each approach in more detail so you can see where they might fit your situation.
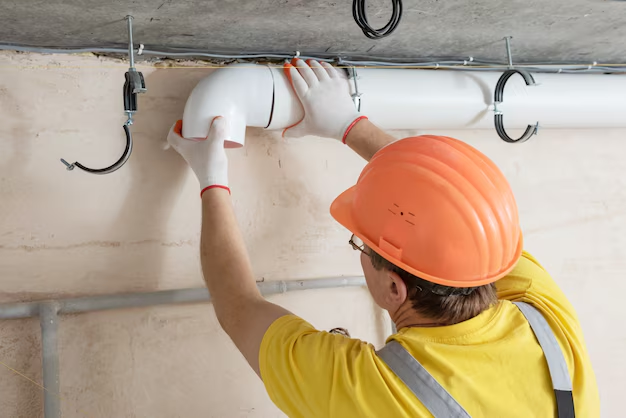
1. Insulate vulnerable pipes
Pipe insulation is one of the most common and cost-effective prevention methods.
What it is
- Foam or fiberglass sleeves that wrap around the pipe
- Often pre-slit so you can snap them over the pipe and tape the seam
- Comes in different sizes to match pipe diameter
When it helps most
- Exposed hot and cold water lines in:
- Unfinished basements
- Garages
- Crawl spaces
- Utility rooms
- Pipes running near exterior walls or drafty areas
Insulation doesn’t “heat” the pipe. It just slows how quickly the pipe loses heat to the cold air around it. That can be the difference between freezing and not freezing during a cold snap.
Factors that affect results
- Climate severity: In milder climates, insulation may be enough. In very cold areas, insulation often needs to be combined with other measures (like heat cable).
- Installation quality: Gaps, uninsulated joints, and bends left exposed are common weak points.
- Other conditions: Strong drafts, uninsulated walls, and unheated spaces can overwhelm light pipe insulation.
People who want a low-effort, “set it and forget it” measure often start here, then add more protection if needed.
2. Use heat tape or heat cable for high-risk pipes
Heat tape (also called heat cable) is an electrical product designed to run along pipes and gently warm them.
How it works
- A flexible electric cable is attached directly to the pipe
- Often used under pipe insulation for better efficiency
- Many products include a built-in thermostat that turns them on and off around a certain temperature range
Typical uses
- Pipes in very cold, exposed areas, such as:
- Crawl spaces with strong drafts
- Unheated garages in cold climates
- Pipes that have frozen before
- Outdoor pipes or short runs that are hard to reroute or fully enclose
Key variables to consider
- Type: Some cables are “constant wattage,” others are “self-regulating,” which vary output based on temperature.
- Safety: These are electrical devices. Local codes, manufacturer instructions, and safe installation really matter.
- Power access: They need an outlet; sometimes that means adding an exterior or basement outlet.
Many homeowners use heat cable selectively—only on the worst problem spots—to keep costs and complexity down.
3. Seal drafts and improve home insulation
Sometimes the problem isn’t the pipe itself; it’s the environment around it.
Where cold gets in
- Gaps around:
- Pipe penetrations through walls and floors
- Dryer vents
- Electrical outlets and switches on exterior walls
- Poorly insulated:
- Crawl spaces
- Attics
- Basement rim joists (where the foundation meets the framing)
How sealing and insulating helps
- Reduces cold air leaks that chill pipes
- Stabilizes indoor temperatures, which protects plumbing and improves comfort
- May lower heating costs as a side benefit
Common methods
- Caulk or foam sealant around small gaps where pipes go through walls or floors
- Weatherstripping on drafty doors to garages or crawl spaces
- Insulating walls or crawl spaces that house plumbing
- Insulating rim joists and basement/garage ceilings below bathrooms or kitchens
This tends to be a more permanent, whole-house approach. People often combine it with other home improvement projects, since it has benefits beyond pipes.
4. Letting faucets drip during a cold snap
Letting a faucet run at a slow drip is a classic short-term measure.
Why it helps
- Moving water is harder to freeze than still water
- Even a slight flow reduces pressure buildup inside the pipe, which is often what causes bursting
When people use this
- During unusually severe cold
- When:
- A specific pipe is known to be vulnerable, and
- Permanent upgrades aren’t in place yet (or are still being planned)
Things that vary by household
- Which faucet(s) to drip: Often the one farthest from where water enters the house, or those on exterior walls or upper floors.
- How much to drip: Usually a thin, steady stream—not a full flow—with the understanding that any water use has a cost.
- Water source and cost: On a private well or septic system, prolonged dripping may have different implications than on city water.
This is not a long-term fix, but it’s commonly used as a stopgap when an extreme cold front is on the way.
5. Opening cabinets and interior doors
Sometimes a small change in airflow can protect pipes.
Opening cabinet doors
Under-sink cabinets along exterior walls can trap cold air. Leaving those doors open:
- Lets warm room air reach the pipes
- Reduces “cold pockets” where pipes might freeze faster
Keeping interior doors open
Closed interior doors can make some rooms much colder. People sometimes:
- Open doors to rooms with plumbing on exterior walls
- Check that heating vents in those rooms are open and not blocked
This is another short-term tactic that’s most useful during cold spells, especially overnight.
6. Shutting off and draining outdoor and seasonal lines
The most reliable way to prevent a pipe from freezing is to remove the water from it.
Where this applies
- Outdoor hose bibs (spigots)
- Irrigation systems
- Pool lines or seasonal outdoor plumbing
Common steps (general idea, not a how-to for your setup)
- Locate the indoor shutoff valve that controls the outdoor line
- Turn off the water to that line
- Open the outdoor faucet to let remaining water drain out
- In some setups, open a drain cap or valve near the shutoff to clear water trapped between the shutoff and the outdoor faucet
Some homes have frost-proof hose bibs that are designed to resist freezing when properly installed and used as directed, but even with those, people often disconnect hoses and shut off water for extra margin.
Exactly how this works depends heavily on your plumbing layout and local codes. Many homeowners ask a plumber to walk them through it once, then repeat the steps each year.
7. What about pipe material—does that change what I should do?
Different pipe materials behave differently in the cold, but none are completely freeze-proof.
General tendencies
Copper and steel
- Good conductors of heat and cold
- Can freeze relatively quickly in very cold, exposed conditions
- Strong but rigid—expansion from ice can create cracks or splits
PEX (cross-linked polyethylene)
- More flexible—can sometimes tolerate some expansion
- Often used in newer homes or remodels
- Still vulnerable where fittings or connected rigid sections exist
PVC/CPVC (plastic)
- Used more commonly for drain or vent lines; sometimes for water supply
- Can be brittle in cold temperatures
The same basic prevention strategies—insulation, sealing drafts, managing exposure—still apply, but some people prioritize added protection (like heat cables) on rigid metal pipes in high-risk areas.
8. Do I need to keep my house at a certain temperature?
There’s no single magic number that guarantees pipes won’t freeze. What matters more is:
- How cold it is where the pipes actually are, not just your thermostat setting
- How well your walls, crawl space, and attic are insulated
- How long the cold lasts
People commonly:
- Avoid turning the heat all the way off when they’re away during winter
- Choose a reduced but still “safe” indoor temperature to balance energy use and risk
- Combine a lower heat setting with pipe insulation and other measures
For seasonal or vacant homes, some owners winterize the plumbing completely (draining lines, adding antifreeze to traps) instead of relying on heating a vacant building. That’s a different process with its own steps and considerations.
9. What should I do if I suspect a pipe is starting to freeze?
This guide focuses on prevention, but it helps to know the general outlines of what people typically do when they suspect trouble.
Common early signs include:
- Water flow slows or stops at one faucet
- Other fixtures still have normal flow
- You see frost or feel extreme cold on a section of exposed pipe
Homeowners often:
- Turn off water to the affected area or the whole house if they suspect a pipe might burst
- Gently warm the area around the pipe using safe methods (for example, warm air from a hair dryer or space heater at a distance), avoiding open flames or unsafe electrical use
- Check for leaks once water flow returns
Exactly how to handle a frozen pipe safely depends on your plumbing layout, access, and comfort level. Many people bring in a licensed plumber once they suspect a pipe is frozen or think it might have burst behind a wall.
10. How do I decide which prevention methods are worth it?
The right mix is different for every home. Here are the main variables people weigh:
1. Local climate and typical winter severity
Colder, longer winters
- More incentive to invest in permanent solutions (insulation upgrades, heat cables, rerouting exposed pipes)
- Short-term tricks alone may not be enough
Milder or occasional freezes
- Some owners lean more on targeted fixes: insulating a few pipes, draining outdoor lines, and using short-term tactics during rare cold snaps
2. Age and design of the home
- Older homes or homes with additions and remodels often have:
- More oddly routed or exposed pipes
- Variable insulation quality
People in these homes may do a room-by-room or zone-by-zone review to find the worst risks.
3. How often the home is occupied
Full-time residence
- Preventive steps focus on keeping systems running safely while occupied
- Daily habits (like opening cabinets during cold spells) can play a bigger role
Seasonal or vacant homes
- Owners often look into winterization: draining lines, shutting off water, and sometimes using antifreeze in certain plumbing components
- May rely less on maintaining indoor heat
4. Access to pipes
Exposed, reachable pipes (basement ceilings, utility rooms) are far easier to:
- Insulate
- Add heat cable to
- Inspect visually
Concealed pipes (inside walls, under slabs) may push people toward:
- Improving surrounding insulation and air sealing
- Adjusting thermostat strategy
- Considering rerouting in problem areas during larger renovations
5. Budget and timing
- Lower-cost, quicker options often used first:
- Insulating accessible pipes
- Sealing obvious drafts
- Seasonal draining of outside lines
- Larger investments typically tied to other projects:
- Opening walls or ceilings to reroute pipes
- Major insulation upgrades
Thinking about how much damage a burst pipe could do in a particular area (finished basement vs. unfinished crawl space, for example) can also shape where people focus their efforts.
Key takeaways to evaluate for your own situation 🧊
To decide how to prevent frozen pipes in your home, it helps to:
Identify your risk zones
- Which pipes are near exterior walls or in unheated spaces?
- Where have you seen drafts or unusually cold spots?
Match solutions to the risk level
- Mild risk: basic pipe insulation and draft sealing
- Higher risk: added measures like heat cable, thermostat strategy, and targeted airflow changes
- Outdoor/seasonal lines: shutting off and draining
Consider your climate and lifestyle
- How cold does it get, and for how long?
- Is the house occupied full-time, part-time, or seasonally?
When you know where your pipes run, how your home holds heat, and which areas get the coldest, the different prevention options in this guide become a menu you can choose from, instead of a mystery list of tips.
From there, many homeowners either handle the basics themselves or use this understanding to have a more productive conversation with a licensed plumber about which long-term protections make sense for their particular home.