How To Fix a Running Toilet: A Simple DIY Guide
A running toilet is one of those small problems that can quietly waste a lot of water and money. The good news: in many homes, you can fix it yourself with basic tools and a little patience.
This guide walks through how a toilet tank works, why toilets keep running, and step‑by‑step ways to troubleshoot and repair the most common issues. It’s written for everyday DIYers, not plumbers.
You’ll also see where things vary from one toilet to another, so you can decide when a quick DIY fix makes sense and when calling a pro might be safer or cheaper in the long run.
How a Toilet Tank Works (So the Fixes Make Sense)
Most standard toilets share a few basic parts inside the tank (the back part that holds water):
- Fill valve (or ballcock): Refills the tank after you flush and shuts off when water reaches the right level.
- Float: Tells the fill valve when the tank is “full.” This might be:
- A float ball on a long arm, or
- A float cup that slides up and down the vertical fill valve.
- Flush valve:
- Flapper (rubber seal) or a canister that lifts when you flush and lets water rush into the bowl.
- Overflow tube: Vertical tube that prevents overfilling; extra water spills into the bowl instead of onto your floor.
- Handle and chain: The handle lifts the chain, which lifts the flapper/canister when you flush.
A toilet runs when water is flowing when it shouldn’t be. That usually means:
- Water is leaking from the tank to the bowl (flapper or flush valve issue), and/or
- Water keeps entering the tank from the supply line (fill valve or float issue).
Understanding which of those is happening is the key to fixing it.
Common Reasons a Toilet Keeps Running
Most running toilets come down to a few usual suspects:
| Cause | What Happens | Typical Fix |
|---|---|---|
| Worn flapper | Water slowly leaks into bowl; fill valve cycles on and off | Replace flapper |
| Chain issues | Flapper can’t seal or can’t open fully | Adjust chain length |
| Water level too high | Water spills into overflow tube nonstop | Lower water level/float |
| Faulty fill valve | Valve never fully shuts off or is noisy | Adjust or replace fill valve |
| Dirty or damaged flush valve seat | Flapper can’t seal properly | Clean or replace flush valve |
| Refill tube positioned wrong | Siphons water into overflow tube | Reposition refill tube |
Not every toilet has the same style of parts, and some brands use canister-style flush valves instead of simple flappers. The general problems are similar, but the exact steps to fix them vary a bit.
First Step: Diagnose What Kind of “Running” You Have
Before you grab tools, figure out how your toilet is running. That shapes which fix matters.
1. Constant trickle or “hissing” sound
Signs:
- You hear a constant hissing or low rushing sound.
- If you lift the tank lid, you see water streaming into the overflow tube or tank.
Likely issues:
- Water level set too high.
- Faulty or dirty fill valve.
- Float stuck or misadjusted.
2. Toilet refills every few minutes
Signs:
- Toilet seems quiet for a bit.
- Every few minutes, you hear it refill for a few seconds, then stop.
Likely issues:
- Slow leak from tank to bowl, often from a worn flapper or dirty flush valve seat.
3. Toilet never really stops running after flushing
Signs:
- After a flush, it just keeps going and never fully stops.
- You may see the flapper not seating, or the chain too tight.
Likely issues:
- Flapper hung up or chain too tight.
- Handle sticking.
- Fill valve not shutting off.
You don’t need to be 100% sure which one it is to start, but noticing these patterns will help you focus on the most likely fix first.
Safety Basics: What to Do Before You Start
Any time you’re working inside the tank:
- Turn off the water:
- Look for a shutoff valve on the wall or floor behind/to the side of the toilet.
- Turn it clockwise until it stops.
- Flush the toilet to empty most of the water from the tank.
- Use a sponge or towel to soak up remaining water if you need a dry area to work.
- Avoid using excessive force on old plastic parts or corroded metal—they can crack or break.
If the shutoff valve doesn’t fully close or is stuck, you may want to be more cautious with bigger repairs and consider whether a plumber is appropriate for your situation.
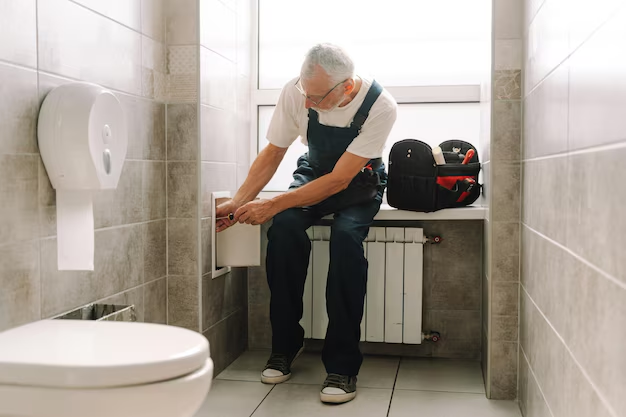
Step-by-Step: Easy Fixes for a Running Toilet
1. Check the Flapper (Most Common Fix)
The flapper is the rubber piece that covers the opening at the bottom of the tank.
How to inspect it
- Remove the tank lid and set it somewhere safe.
- Look at the rubber flapper:
- Is it warped, cracked, slimy, or stiff?
- Does it sit evenly on the opening (the flush valve seat)?
- Gently press the flapper down when the tank is full:
- If the running sound stops, you’ve likely found the problem.
How to adjust or replace the flapper
If the flapper looks okay, but doesn’t seal:
- Check the chain:
- There should be a little slack when the flapper is closed.
- If the chain is too tight, it can hold the flapper slightly open.
- If it’s too loose, the handle might not lift it fully when you flush.
- Adjust by moving the clip to a different link.
- Check the chain:
If the flapper is old or damaged:
- Turn off the water and drain the tank (as above).
- Unhook the chain from the handle lever.
- Unclip or slide the flapper off the pegs on the overflow tube.
- Take the old flapper with you (or compare measurements) if you’re buying a new one—flappers vary by:
- Size (commonly 2" or 3")
- Style (standard vs. specialty for certain brands)
- Install the new flapper:
- Attach it to the pegs on the overflow tube.
- Reconnect the chain with slight slack.
- Turn water back on, let tank fill, and test a few flushes.
Variables that matter here:
- Toilet brand/model: Some require specific flapper designs.
- Age of toilet: Older toilets may have corroded hardware or non-standard parts.
- Water quality: Hard water can wear rubber out faster.
2. Adjust the Water Level and Float
If water is flowing into the overflow tube, your tank is filling too high.
You want the water level below the top of the overflow tube by a small margin (often there’s a “water line” mark inside the tank).
How you adjust it depends on your float type:
For a float ball (on an arm)
- Look for a long rod with a ball float on the end.
- Slightly bend the rod downward (gentle pressure in the middle of the rod), which lowers the shutoff point.
- Turn water back on, let the tank fill, and check the level.
For a float cup (attached to fill valve)
- Look for a plastic ring or clip on the side of the fill valve.
- Squeeze or slide the clip and move the float down a bit.
- Turn the water on, let it fill, and adjust in small steps until:
- The water is below the top of the overflow tube.
- The toilet stops filling and stays quiet.
Variables:
- Different fill valves adjust in different ways—some have a screw on top you turn to raise/lower the float.
- Some toilets are designed for lower water levels; follow any “water line” marking you see inside the tank when in doubt.
3. Fix or Replace the Fill Valve
If adjusting the float doesn’t help, or the fill valve keeps running, stalls, or makes loud noises, the valve itself may be worn or dirty.
Basic cleaning/adjustment
Sometimes debris in the water line affects the seal:
- Turn off the water and flush the tank.
- Depending on your fill valve style, you may be able to:
- Remove the top cap (follow any diagrams on the valve).
- Rinse or wipe any visible dirt from the seal and moving parts.
- Reassemble, turn water on, and test.
If the valve is old or clearly failing, many DIYers choose to replace it instead of fussing with it.
Replacing a fill valve (general steps)
- Turn off water and flush tank dry.
- Sponge out remaining water from the tank bottom.
- Disconnect:
- The water supply line from the bottom of the fill valve (under the tank).
- The refill tube from the overflow pipe.
- Inside the tank, remove the retaining nut under the fill valve (usually under the tank, threaded through the bottom).
- Lift out the old valve.
- Follow the new valve’s instructions to:
- Adjust the height to fit your tank.
- Install the rubber gasket.
- Insert into tank, add the nut underneath, and hand-tighten (too tight can crack the tank).
- Reattach the supply line and refill tube.
- Turn on water, check for leaks at the base, and adjust water level as needed.
Important variables:
- Tank depth: Your new fill valve must match the tank’s height range.
- Supply line type: Flexible braided lines are easier to reconnect than rigid ones.
- Condition of old fittings: Corroded parts may be more fragile.
If any fittings seem questionable or you’re not comfortable disconnecting the supply line, that’s a common point where people consider professional help.
4. Check the Refill Tube Position
The refill tube is the small flexible tube that runs from the fill valve to the overflow tube.
If it’s inserted too far down the overflow tube, it can siphon water from the tank into the bowl and keep the fill valve running.
To fix:
- Make sure the refill tube’s end:
- Points into the top of the overflow tube, or
- Clips to the top edge.
- It should not be shoved down inside the tube several inches.
- Trim it if it’s excessively long and wants to droop down inside.
5. Clean or Repair the Flush Valve Seat
If you’ve replaced the flapper and the toilet still slowly drains into the bowl, the flush valve seat (the opening the flapper seals against) might be:
- Dirty or coated with mineral buildup.
- Pitted or damaged.
To clean it
- Turn off water, drain tank.
- Lift or remove the flapper.
- Use a non-scratch pad or cloth to gently clean the ring where the flapper sits.
- Avoid using anything too abrasive that might make the surface rougher.
To replace the flush valve (more advanced DIY)
Replacing the entire flush valve usually means:
- Turning off water and disconnecting supply.
- Removing the tank from the bowl by loosening tank bolts.
- Swapping out the flush valve assembly.
- Reinstalling the tank with new bolts and gaskets.
This is a more involved job and may be best suited for folks comfortable with moderate DIY plumbing. It also depends on:
- The condition of the tank bolts and gaskets.
- The space and access around your toilet.
- Whether you’re okay handling a heavy porcelain tank.
When a Running Toilet Might Be More Complicated
Not every running toilet is a simple flapper or fill valve issue. Sometimes, other factors come into play:
- Specialty or high-efficiency toilets: Dual-flush, pressure-assisted, or brand-specific systems can use unique parts and repair steps.
- Very old toilets: May have non-standard fittings, corroded metal parts, or hard-to-find replacement pieces.
- Multiple issues at once: You might have both a worn flapper and a fill valve problem, for example.
- Underlying water supply issues:
- Extremely high water pressure can stress your toilet parts.
- Sediment-heavy water can clog or wear valves faster.
In these cases, you may need:
- Brand-specific replacement parts.
- Diagrams from the manufacturer.
- A pro to assess whether repair or replacement of the whole toilet makes more sense.
How to Tell if You Actually Fixed the Running Toilet
Once you’ve made an adjustment or replacement, you want to confirm it worked:
Watch and listen:
- Let the tank fill.
- Stand nearby for a few minutes.
- Confirm the water stops and stays quiet.
Check the bowl for movement:
- Shine a flashlight into the bowl.
- Look for ripples or movement in the water when nobody has flushed recently.
- Still water suggests there’s no ongoing leak from tank to bowl.
The dye test (for slow leaks):
- Add a few drops of food coloring (or a tank-safe dye tablet) to the tank, not the bowl.
- Wait 15–30 minutes without flushing.
- If colored water appears in the bowl, you still have a leak from tank to bowl.
Remember: some leaks are very slow, so it may take time to be sure. If you’ve tried the obvious fixes and dye still appears in the bowl, you may be looking at:
- A still-problematic flapper or chain.
- A rough or damaged flush valve seat.
- A problem elsewhere in the tank assembly.
Factors That Shape Your Best Approach
There isn’t one ��right” way for everyone to handle a running toilet. What makes sense for you depends on a few things:
- Comfort level with DIY:
- If handling water connections and tank parts makes you nervous, you might stick to simple adjustments (chains, floats) and leave valve replacements to a pro.
- Type and age of your toilet:
- Modern, standard toilets often accept universal repair kits.
- Older or specialty systems may need brand-specific parts or more delicate handling.
- Condition of parts and fittings:
- Brittle plastic, rusted bolts, or stuck shutoff valves make DIY riskier.
- Time vs. cost trade‑off:
- Tinkering and learning can be satisfying if you enjoy DIY.
- If you want it handled quickly with the least hassle, professional repair can sometimes be the more practical path.
Knowing these variables helps you judge which fixes feel realistic for your home—and which might be better left to someone with plumbing experience.
Quick FAQ on Fixing a Running Toilet
Why is my toilet still running after I replaced the flapper?
Common possibilities:
- Chain too tight or too loose, preventing a proper seal.
- Water level too high, so water spills into the overflow tube.
- The flush valve seat is dirty or damaged, so even a new flapper can’t seal.
- The fill valve is faulty and not shutting off.
Checking each of those in turn usually reveals the next step to try.
Can a running toilet cause high water bills? 💧
Over time, yes. Even a slow, almost silent leak can waste a surprising amount of water in a month. The exact impact depends on:
- How constant the leak is.
- Your local water rates.
- How many toilets are leaking and for how long.
Because of that, many people choose to address a running toilet sooner rather than later, even if it’s just a quiet trickle.
Do I need any special tools to fix a running toilet?
For simple fixes like adjusting the chain or float, often no tools are necessary. For basic part replacements, you might use:
- An adjustable wrench or pliers (for supply line and nuts).
- A sponge or towel.
- A flathead screwdriver (for some float adjustments).
More advanced repairs (like removing the tank) may require a wrench set and more time and care.
When is it better to replace the whole toilet instead of repairing it?
That depends on:
- The age of the toilet.
- The frequency of problems (constant repairs vs. a rare issue).
- Whether other parts are also worn or cracked.
- Your goals around water efficiency and long-term maintenance.
Some people keep an older toilet going with small repairs for many years. Others decide, once several major parts are failing or unavailable, that replacement is the more practical long-term move. That’s a judgment call based on your budget, water costs, and comfort with ongoing DIY repairs.
Fixing a running toilet is often very doable for an everyday DIYer, especially when the problem is a worn flapper, misadjusted float, or simple fill valve issue. The key is to move step by step: observe what the toilet is doing, start with the simplest likely causes, and decide how far you’re comfortable going with repairs based on your own tools, skills, and patience.