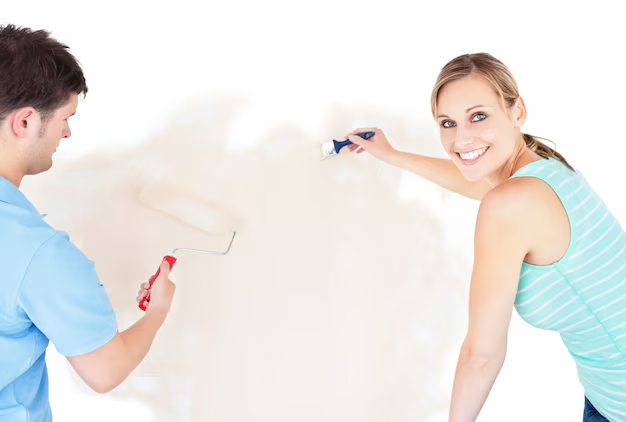
How to Prep Walls Before Painting: A Step‑by‑Step Guide for DIYers
When people ask how to get a “professional-looking” paint job, the boring answer is usually the right one: good prep beats fancy paint. How you prepare your walls often matters more than the paint color or brand.
This guide walks through how to prep walls before painting, what steps typically matter, and where your own situation might change the plan.
Why Wall Prep Matters So Much
Paint sticks to the surface it’s on, not to your hopes for a smooth finish. If that surface is dusty, glossy, greasy, cracked, or peeling, you can expect:
- Visible bumps and patches
- Peeling or flaking over time
- Uneven sheen (shiny/dull spots)
- Stains bleeding through
Good wall prep does three things:
- Cleans so paint can grip.
- Smooths so flaws don’t show through.
- Seals so stains and repairs don’t “telegraph” into your new coat.
How far you need to go depends on:
- Wall material (drywall, plaster, wood paneling, etc.)
- Current condition (sound vs cracked/peeling)
- Existing finish (flat vs glossy paint, stains, wallpaper)
- Room type (kitchen/bath vs bedroom)
- How picky you are about the final look
Step 1: Evaluate Your Walls Before You Touch Anything
Before grabbing a roller, do a slow walkaround.
Look and feel for:
- Cracks (hairline vs wide)
- Holes (nail holes, anchors, bigger damage)
- Peeling or flaking paint
- Glossy or slippery areas
- Stains or discoloration
- Dents and bumps
- Moisture issues (soft spots, bubbling, mold)
This first pass tells you:
- How much repair work you’re in for
- Whether you might need stain-blocking primer
- If you should consider fixing moisture or structural issues first
If walls are soft, damp, or moldy, that’s usually a “fix the underlying problem first” situation, not a “just paint over it” job.
Step 2: Protect the Room and Remove Obvious Obstacles
You can prep perfectly and still be miserable if everything is covered in dust and splatter. Before cleaning or sanding:
- Move furniture away from walls or out of the room if possible.
- Cover remaining furniture with plastic or old sheets.
- Lay down a drop cloth or rosin paper on the floor, especially along walls.
- Remove switch plates and outlet covers (and keep screws in a labeled bag).
- Take down nails, hooks, and hardware you’re not keeping.
- Mask what you don’t want dust/paint on, like light fixtures, trim, and window frames, if they’ll stay put.
Variables here:
- If you’re renting or have very delicate floors/trim, you may want extra protection.
- If you’re doing only one accent wall, you might just protect that area.
Step 3: Clean the Walls So Paint Can Stick
Even walls that “look clean” usually have dust, oils, and grime that can interfere with how paint adheres.
Basic Dusting and Washing
Most walls benefit from:
Dusting:
- Use a dry microfiber cloth, Swiffer-type duster, or vacuum with a soft brush head.
- Start at the ceiling line and work down.
Wiping with a mild cleaner:
- Mix mild dish soap with warm water in a bucket.
- Wipe with a sponge or cloth, wringing it out so it’s damp, not dripping.
- Rinse lightly with clean water if walls feel soapy.
- Let dry completely.
When You Need More Than Soap and Water
Different rooms and wall histories need different cleaning approaches:
| Situation | Typical Issue | Cleaning Approach to Consider |
|---|---|---|
| Kitchen walls near stove | Grease, cooking residue | Degreaser or stronger cleaner |
| Bathroom walls | Soap scum, hairspray, mildew spots | Bathroom cleaner; mildew remover where needed |
| Heavy smokers / fireplace room | Smoke film, odor, yellowing | Stronger cleaner; often stain-blocking primer later |
| Kid/pet markings (crayon, marker) | Wax, pigment, oils | Specialty cleaner or stronger household cleaner |
If you see mold (fuzzy, musty-smelling growth rather than just a stain), many people treat this as an issue that may need professional guidance. Paint and primer aren’t solutions for active mold problems.
Step 4: Scrape, Sand, and Deal With Peeling or Glossy Paint
Paint doesn’t like sticking to loose, shiny, or chalky surfaces.
Removing Loose or Flaking Paint
- Gently scrape flaking or peeling areas with a putty knife or paint scraper.
- Feather the edges (no sharp “ridges” where old paint meets bare wall).
- Sand those edges lightly to smooth transitions.
If large sections of paint are peeling, that can be a sign of:
- Moisture issues
- Poor prior prep
- Incompatible paint layers (for example, latex over old glossy oil without proper prep)
Those larger problems may call for a deeper fix than basic DIY prep.
Dealing With Glossy Paint
New paint tends to struggle on high-gloss or semi-gloss surfaces unless you help it.
Common options:
Scuff-sanding:
- Use a fine- to medium-grit sanding sponge or sandpaper.
- Lightly sand until the shine is dulled, not until you remove all paint.
- Wipe down dust after sanding.
Liquid deglosser (“liquid sandpaper”):
- Wipe on with a cloth as directed.
- Softens/etches the glossy layer to help new paint grip.
- Check product safety instructions and ventilation needs.
Which approach people use often depends on:
- Size of area (big rooms vs small trim)
- Comfort level with sanding and dust
- Ventilation and sensitivity to chemicals
Step 5: Repair Holes, Cracks, and Dents
Fresh paint magnifies flaws instead of hiding them. This is the tedious part that makes the biggest visual difference.
1. Filling Small Holes and Nail Pops
For tiny issues (picture nail holes, small dings):
- Use spackle or lightweight joint compound.
- Apply with a small putty knife.
- Overfill slightly, then smooth.
- Let dry as directed.
- Sand lightly with fine-grit paper until flush.
2. Fixing Larger Holes or Damage
Bigger holes (from anchors, accidents, or doorknobs) need more structure:
Medium holes:
- Some people use patch kits with mesh and joint compound.
- Apply patch, cover with compound, feather out beyond the patch, let dry, sand, and repeat if needed.
Larger or deep damage:
- May need actual drywall patch pieces, taping, and multiple coats of compound.
- At a certain size or complexity, many DIYers bring in a pro or someone with drywall experience.
3. Treating Cracks
For hairline cracks:
- Open them slightly with a putty knife (so filler can get in).
- Fill with joint compound or spackle.
- Sand smooth after drying.
For larger or recurring cracks (especially in plaster or along corners):
- Often need tape (paper or fiberglass mesh) plus joint compound.
- Technique matters more here; poor taping can be visible under paint.
Variables in repair:
- Wall type: Drywall vs old plaster behave differently.
- Desired finish: A “good enough” rental refresh vs a near-perfect showroom wall.
- Time and patience: Many repairs need at least two rounds: fill → dry → sand → touch up.
Step 6: Sand for Smoothness (Within Reason)
You don’t need to sand every square inch of every wall, but targeted sanding makes patched areas disappear.
Typical order:
- Sand over all patches and repaired areas until smooth to the touch.
- Feather edges around those patches so they blend into the wall.
- Lightly sand rough spots, drips, or paint ridges left from previous jobs.
Use:
- Fine-grit sandpaper (often in the 180–220 range) for most smoothing.
- A sanding sponge for corners and curves.
Always:
- Wear a dust mask and eye protection.
- Vacuum or wipe down walls afterward to remove all dust.
Special case:
If you want super-smooth, high-end walls (especially for glossy paint or dark colors), some people skim-coat entire walls with joint compound and sand them. That’s a more advanced, dusty job and not necessary for a basic refresh.
Step 7: Address Stains and Problem Areas
Some marks will bleed through new paint unless you deal with them first.
Common trouble spots:
- Water stains from past leaks
- Nicotine or heavy smoke stains
- Marker, crayon, or ink
- Grease stains
- Tannin bleed (from certain woods, if you’re painting paneling)
These often need a stain-blocking primer on the affected area (sometimes the whole wall). Primer creates a barrier so the stain doesn’t show through multiple coats of paint.
If staining is widespread, many people simply prime the entire wall instead of spot-priming here and there.
Step 8: Decide Whether You Need Primer – And Which Kind
Primer isn’t always optional, but it’s not always mandatory for every single wall either. Whether you need it depends on:
- What’s on the wall now
- What you’re painting with
- How perfect you want the result to look
When Primer Is Commonly Used
Situations where primer is often helpful or expected:
- Brand‑new drywall or fresh joint compound
- Drastic color changes (dark to light or intense colors)
- Stains, smoke, or water marks
- Glossy or previously oil-based paint that’s been deglossed
- Patch‑heavy walls with lots of spackle/joint compound
- Painting over bare surfaces (bare drywall, raw wood, bare metal)
Main Types of Wall Primers (Big Picture)
You’ll see three general categories:
| Primer Type | Typical Strengths | Common Trade‑offs |
|---|---|---|
| Water‑based (latex) | Easy to use, low odor, fast drying, flexible | May struggle with severe stains or bleed-through |
| Oil‑based | Great stain blocking and adhesion on tough surfaces | Stronger odor, harder cleanup, more restrictions in some areas |
| Shellac‑based | Very strong stain & odor blocking, quick drying | Strong fumes, more specialized use |
People choose among these based on:
- Sensitivity to fumes and ventilation options
- Severity and type of stains
- What paint is already on the wall and what paint they’re using next
- Local rules or availability for certain products
If you’re unsure, many DIYers find that a good quality water‑based primer is often enough for ordinary, previously painted, non‑stained walls and patches.
Step 9: Caulk Gaps at Trim and Corners (Optional but Nice)
This step doesn’t affect how paint sticks to walls, but it can improve how the finished job looks.
Where caulk is commonly used:
- Gaps between baseboards and the wall
- Cracks between window/door trim and the wall
- Small static gaps at crown molding edges
Some details to keep in mind:
- Use paintable caulk (non‑paintable types will repel paint).
- Don’t caulk where shifting is heavy or where you might need separation (like between removable items and walls).
- Smooth it with a damp finger or caulk tool, and let it dry before painting.
Variables:
- Older homes with lots of trim often benefit more from caulking.
- In newer or very minimal spaces, there may be fewer gaps to bother with.
Step 10: Final Wipe-Down and Tack Check
Right before you paint, especially after sanding:
- Vacuum or dry-dust walls and baseboards again.
- Wipe walls lightly with a slightly damp cloth or microfiber to catch fine dust.
- Let them dry completely.
- Run your hand over repaired areas:
- If you can feel a ridge or bump, you’ll likely see it once paint dries.
Some DIYers use a tack cloth (a sticky dust cloth) on small areas, but on large wall surfaces, a damp microfiber rag is more common.
Different Wall Types, Different Prep Needs
Not all walls are created equal. Prep is shaped by what you’re working with.
Common Interior Wall Types
| Wall Type | Typical Issues | Prep Differences |
|---|---|---|
| Drywall | Nail pops, dents, screw holes | Spackle/joint compound, sanding, primer on patches |
| Plaster | Cracks, crumbling spots | May need mesh tape, multiple compound coats; sometimes professional help |
| Wood paneling | Glossy finish, knots, dark color | Deglossing, strong primer, dealing with wood tannins |
| Previously wallpapered | Residue, damaged paper, hidden flaws | Thorough removal or specialized primer over wallpaper if left in place |
If you’re dealing with very old paint that might contain lead (often in homes built many decades ago), there are safety considerations for sanding and scraping. Many people in that situation consult local regulations or professionals before heavy sanding.
How Much Prep Do You Really Need?
The honest answer: it depends on your standards, time, and wall condition.
You might fall into one of these broad approaches:
| DIY Profile | Typical Prep Approach |
|---|---|
| “Just freshen it up” renter | Basic cleaning, quick patch of obvious holes, minimal sanding, touch‑up primer where needed |
| Careful homeowner, main rooms | Full clean, thorough repairs, sanding patches, targeted stain‑blocking, primer where helpful |
| Perfection‑seeker / feature wall | All of the above plus more detailed sanding, possible skim‑coating, full‑wall priming |
To decide what fits you, think about:
- How long you expect to live with this paint job
- How visible the room is (guest room vs main living area)
- Whether small flaws will bother you daily
- How much dust, drying time, and effort you’re willing to invest
Quick Checklist: Wall Prep Before Painting
Here’s a condensed checklist you can adapt to your own space:
- Inspect walls for cracks, holes, stains, peeling, and moisture.
- Protect room: move/cover furniture, protect floors, remove switch plates.
- Dust and wash walls with mild cleaner; degrease kitchens/baths as needed.
- Scrape loose paint and sand edges smooth.
- Dull glossy surfaces by sanding or using a deglosser.
- Repair holes and cracks with spackle or joint compound; let dry.
- Sand repairs until smooth and feathered; remove dust.
- Spot-treat stains and problem areas that may bleed through.
- Prime bare patches, new drywall, repaired spots, and any stained or tricky surfaces.
- Caulk gaps at trim and corners (if you care about a crisp finish).
- Final dust/wipe-down so walls are clean, dry, smooth, and ready for paint.
You don’t have to do every possible prep step on every wall. The “right” level of prep for you depends on your walls, your expectations, and how much time and energy you’re willing to trade for a smoother, longer‑lasting finish. Knowing the full menu of options lets you choose what’s worth it for your particular DIY painting project.